Preparation#
installation/Update#
You download the current installation package for the add-on from the i-doit Customer Portal after purchasing a valid license. installation is performed in the i-doit Admin Center under the "Add-ons" tab. There you select the package via "Browse," specify for which tenant(s) the add-on should be available, and complete the installation via "Upload and install."
After a new version is released, you upload the updated package from the Customer Portal in the Admin Center in the same way.
Assigning rights#
For a user to be able to create templates and generate documents, you need to assign the corresponding rights. This is possible in the i-doit Administration under Authorization System > Rights Assignment > Documents when the add-on is installed.
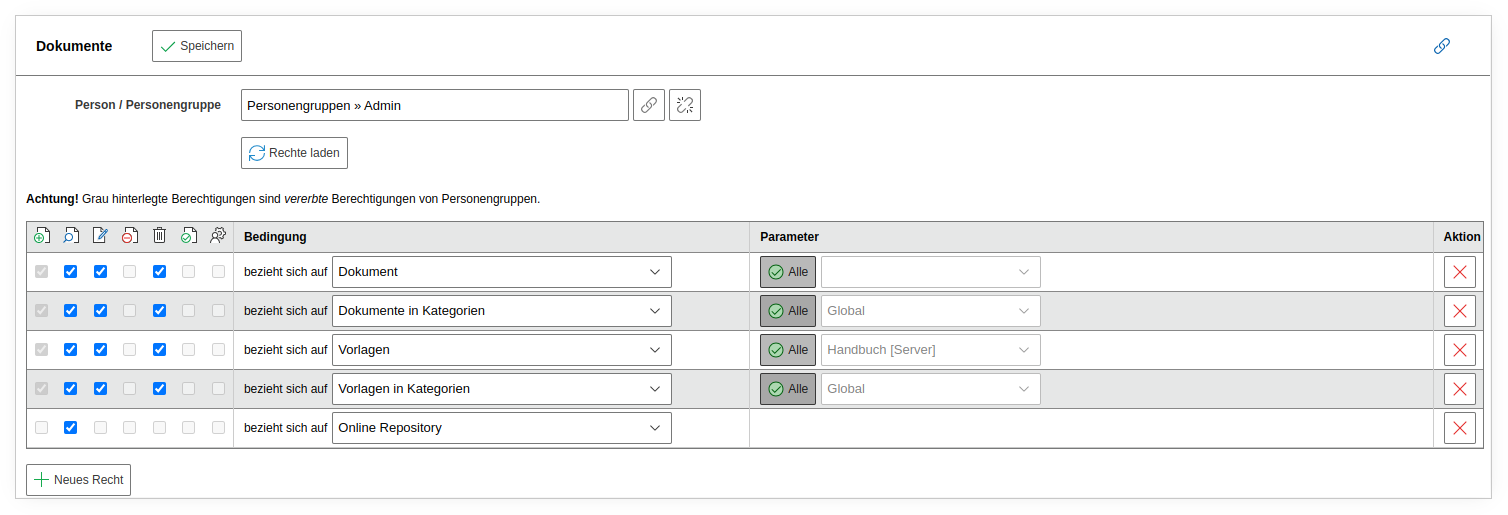
The following permissions are available:
- Document -- Grants access to individual or multiple documents. Users with this permission can edit the selected documents.
- Documents in Categories -- Grants access to documents based on document categories.
- Templates -- Allows editing of document templates.
- Templates in Categories -- Restricts access to templates from defined categories.
- Online Repository -- Required to download templates from the Online Repository.
Additional Configuration#
The add-on makes the category "Documents" available for all object types. You link the category to the desired object types via the object type configuration or via Edit data structure. This way, only the object types you have specified appear during document creation.
Documents Category
For a document to be created for an object, the "Documents" category must be linked to the object type. If the object type does not have this category, no documents can be created for the objects it contains, as they will not appear in the selection.
Accessing the Add-on#
After all preparations are complete, you can access the add-on via Extras > Documents.
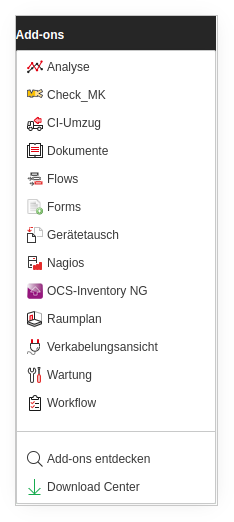
The appearance of the "Extras" menu may vary due to different rights and/or additional installed add-ons.