Setting Up the ISMS Add-on#
This document describes the complete setup of the ISMS add-on in i-doit.
Setting Up the ISMS Add-on#
Before using the add-on, you must complete four basic steps.
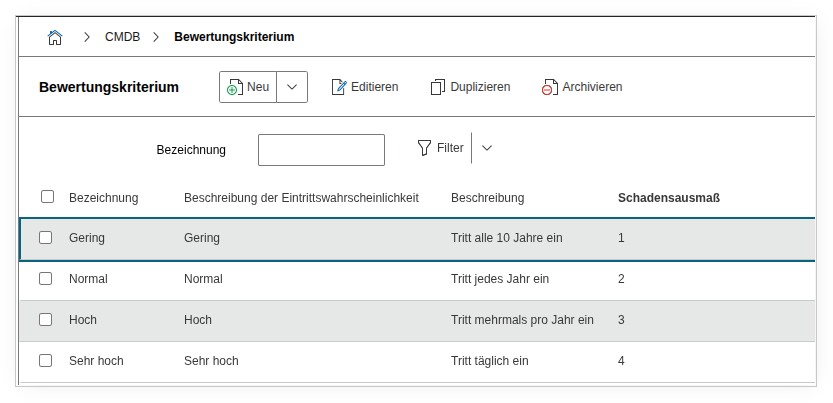
1. Define Assessment Criteria#
- Define criteria for probability of occurrence and impact
- The values must be integers and serve as axis labels in the risk matrix
For example
| Level | Name | Description of probability of occurrence |
|---|---|---|
| 1 | Low | Occurs every 10 years |
| 2 | Normal | Occurs every year |
| 3 | High | Occurs several times per year |
| 4 | Very high | Occurs daily |
The level should be a positive integer, by which the criteria are sorted in ascending order. The description of the probability of occurrence is optional.
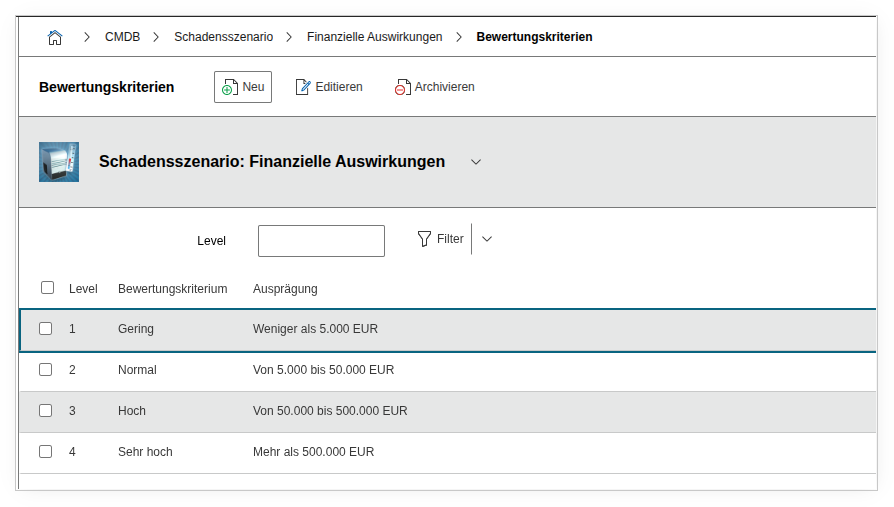
2. Create Damage Scenarios#
Examples: - Financial damage - Violations of laws or contracts - Data protection breaches - Negative public perception
For example
| Identifier | Name | Assessment Criteria |
|---|---|---|
| 1 | Financial Impact | Low: Less than 5,000 EUR |
| Normal: From 5,000 to 50,000 EUR | ||
| High: From 50,000 to 500,000 EUR | ||
| Very high: More than 500,000 EUR |
Create appropriate specifications for each assessment criterion. You can orient the damage scenarios to those defined in the BSI IT-Grundschutz. The identifier is used for sorting.
3. Define Risk Classes and Risk Formula#
- Configuration under Add-ons > ISMS > Risk Classes
- The risk matrix is based on the assessment criteria and the selected calculation formula
- Risk classes can be individually customized and color-coded
Risk Classes#
For further evaluation, you now choose how critical a risk level is assessed. You can define colors for this.
| Color | Risk Level |
|---|---|
| Red, for values less than or equal | - |
| Yellow, for values less than or equal | 6 |
| Green, for values less than or equal | 3 |
The selected values result in a risk matrix.

Risk Formula and Risk Matrix#
If no assessment criteria are defined, the risk matrix will not be displayed.
The risk formula defines how the risk level is calculated from the assessment criteria. Example for the formula "Maximum risk evaluation + probability of occurrence = risk level":
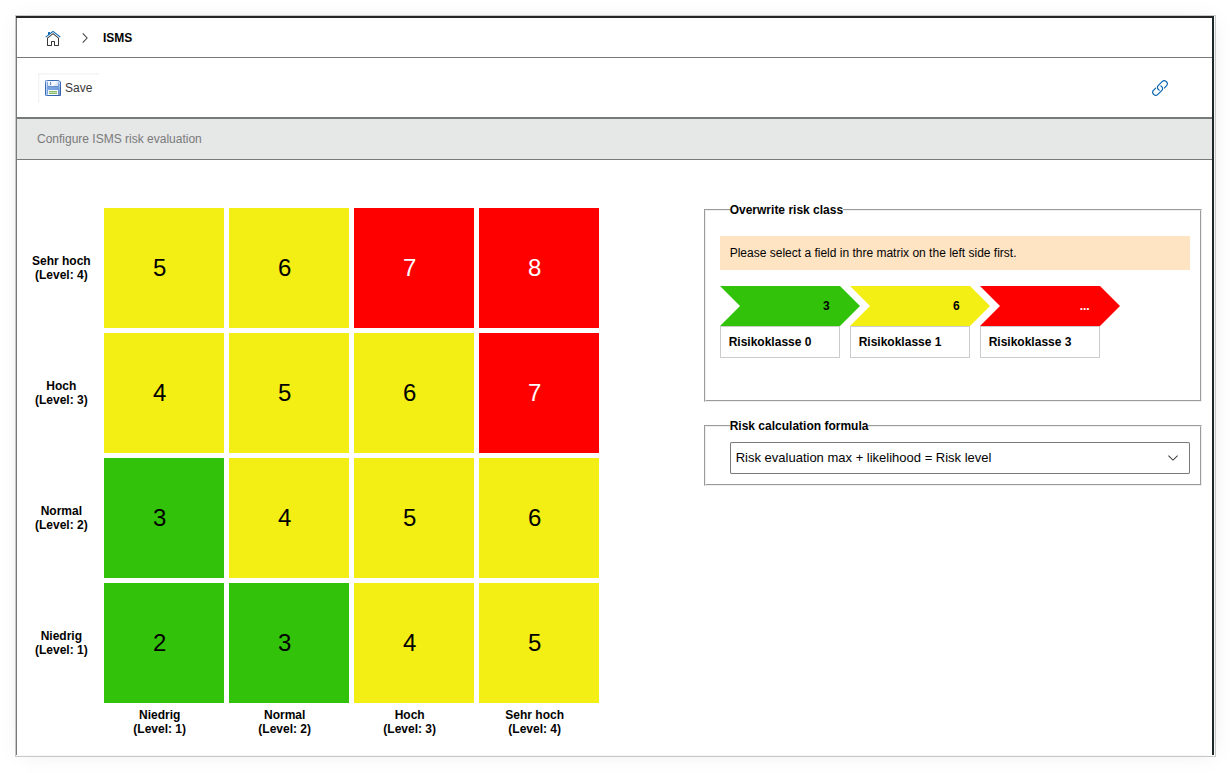
Manually override risk matrix fields
In the risk matrix, you can manually override individual fields. Click on the desired field and select the desired risk class.
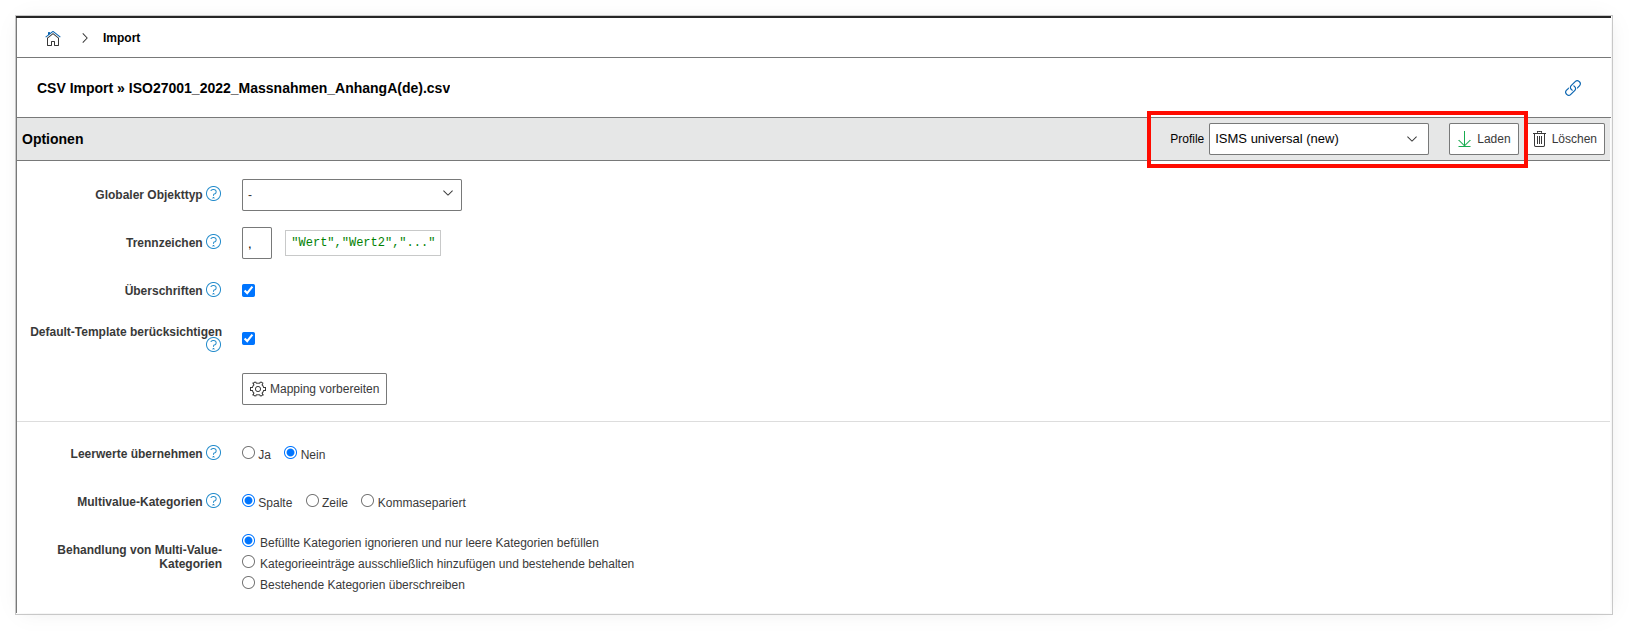
4. Add Measures#
- You can create measures manually or import them via CSV from catalogs
- For ISO 27001, importing the measures from Annex A is recommended
- The catalogs are included in the add-on package and can be imported via the i-doit CSV import:
- Extras > CMDB Import > CSV Import
- Catalogs are located in the add-on directory under:
src/classes/modules/iso27001/Catalogs/ - Load import profile: ISMS universal (new)
- Start import
Since a risk always consists of a threat and a vulnerability, it is recommended to also create these object types.
| File | default | Description | Version | Language | Number of Licensed Objects |
|---|---|---|---|---|---|
| ISO27001_Massnahmen_AnhangA(de).csv | DIN EN ISO/IEC 27001 | Annex A measures | 2022 | DE | ~93 |
| ISO27001_Controls_AnnexA(en).csv | DIN EN ISO/IEC 27001 | Controls Appendix A | 2022 | EN | ~93 |
| IT-Grundschutz-Kompendium_Elementare Gefaehrdungen(de).csv | BSI Grundschutz Compendium | Elementary threats as threat/vulnerability | - | DE | ~47 |
| IT-Grundschutz-Kompendium_Elementary_Threats(en).csv | BSI Grundschutz Compendium | Elementary threats as threat/vulnerabilities | - | EN | ~47 |
| IT-Grundschutz-Kompendium_Anforderungen(de).csv | BSI Grundschutz Compendium | Requirements from modules as measures | 2023 | DE | ~1834 |
| NIS2-Anforderungen(openkritis.de).csv | NIS2 | NIS2 requirements as measures | - | DE | ~36 |
Optionally Settings#
In the tenant settings, you can activate the option "Filter report views by location rights".
The ISMS add-on supports rights assignment by location to enable flexible and secure management of information.
What does this setting do?#
If the option is active, only the risk assessments that you are permitted to see are displayed in the report views provided by the ISMS add-on. Specifically, it checks whether you have the "View" right for the "ISMS" category on the corresponding objects.
Assigning Measures to Locations#
Additionally, you can configure the "Location" category for objects of the type "SOA Measure" or "Annex A Measure." This allows measures to be assigned to specific locations.
Benefits of this Feature#
- Locations maintain the implementation status of their own measures themselves.
- You only see the measures of your own location.
- A central office can create reports for all locations or filtered by individual locations.
Note
The "Location" category can be activated for SOA measures and Annex A measures.