Provisioning VMs (deprecated)#
Deprecated
In this article, we explore the use case of provisioning virtual machines (VMs) through i-doit. We leverage a well-maintained IT documentation, combined with a few scripts, to make this automation a reality.
Problem Statement#
Until now, a strict distinction has been made between documentation and configuration data: In i-doit, the organization-wide IT is documented, including a virtualization cluster consisting of multiple virtualization hosts (host systems) and the virtual machines (guest systems) running on them. The configuration of each VM, i.e., creating a new VM with specific details about CPU, memory, network, disk space, etc., takes place within the cluster's administration interface. This process is also called provisioning.
In daily practice, the process therefore looks like this: a new VM is created via a dedicated tool, and the completed work is subsequently documented in i-doit:
- Start the configuration tool of the virtualization cluster
- Create and configure a new VM
- Switch to the IT documentation (i-doit)
- Create a new VM, store the configuration in the corresponding categories, assign the VM to the cluster
There is no data exchange between the tool used and i-doit, so the VM configuration must be done twice. Errors when transferring the configuration are not excluded. The redundant maintenance of configuration data is therefore a thankless task for the administrator.
This article is outdated and no longer current
Please note that the procedure described here may already be outdated.
Solution#
We want to optimize this process by using the configuration data available in i-doit and automating several steps. To do this, we rearrange the process:
- Open the IT documentation (i-doit)
- Create a new VM, store the configuration in the corresponding categories, assign the VM to the cluster
- The VM is automatically created and provisioned in the configuration tool of the virtualization cluster.
Four manual steps become two. The third step happens automatically in the background. The administrator no longer needs to maintain configuration data twice. Error sources are eliminated. The administrator is satisfied.
Assumptions#
We will walk through this use case completely with an example. It is intended to demonstrate the general approach and can be easily transferred to other environments. For the solution, we assume:
- The virtualization cluster is based on VMware vSphere version 5.
- i-doit is installed on Debian GNU/Linux 8.5. For this, we use the Eval Appliance. The distribution packages should be brought up to date with apt.
- The i-doit version is at least 1.7.1. The i-doit host is accessible via the FQDN i-doit.example.net.
- We use the VMware vSphere Client to verify the automation.
- A user exists in VMware vSphere who is allowed to provision VMs. In this example, this user is called vmprovision with the password vmprovision.
Configuration#
Let us start with the preparatory work so that both systems can communicate with each other.
vSphere SDK#
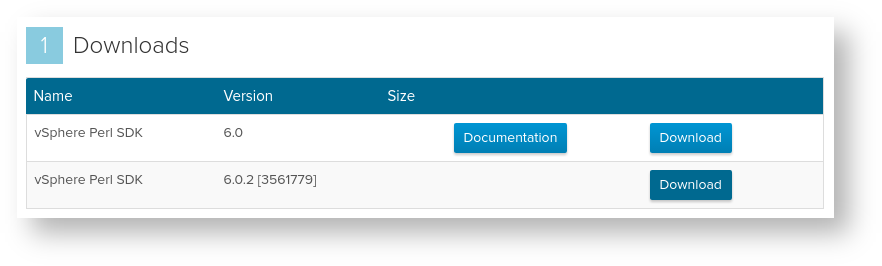
For i-doit to be able to tell the vSphere cluster to provision a new VM, we need the VMware SDK for Perl on the i-doit host. We download version 6.0.2. A VMware account is required, and the VMware End User License Agreement (EULA) must be accepted. We choose the download package for 64-bit operating systems as a tarball (.tar.gz).

After downloading, we copy the tarball to the i-doit host and extract it. Since we need root privileges for almost all subsequent commands, we log in as root:
1 2 3 4 5 6 | |
Now is a good time to bring the system up to date. We also install additional packages via apt and cpan:
1 2 3 | |
Since the SDK does not officially support the Debian GNU/Linux operating system, we need to trick the SDK into thinking it is running on a different OS:
1 | |
The SDK requires the environment variables http_proxy and ftp_proxy:
1 2 | |
Now we install the SDK. It comes with an installation script:
1 | |
The script will ask you to confirm the VMware EULA with yes. If it wants to install additional Perl modules, this should be confirmed with yes. If the installation was successful, the following text appears, among others:
1 | |
At this point, the SDK installation is complete. We gratefully followed this guide. Thank you! And now let us continue:
i-doit API#
Communication between i-doit and VMware takes place, among other things, via the i-doit API. This must be activated and the API key must be known. To use the API conveniently, we use the reference client for PHP:
1 2 3 4 | |
The API client asks for the URL and API key of the i-doit installation to be used during make initialize.
Script#
The following script serves as the link between i-doit and VMware:
1 2 3 4 5 6 7 8 9 10 11 12 13 14 15 16 17 18 19 20 21 22 23 24 25 26 27 28 29 30 31 32 33 34 35 36 37 38 39 40 41 42 43 44 45 46 47 48 49 50 51 52 53 54 55 56 57 58 59 60 61 62 63 64 65 66 67 68 69 70 71 72 73 74 75 76 77 78 79 80 81 82 83 84 85 86 87 88 89 90 91 92 93 94 95 96 97 98 99 100 101 102 103 104 105 106 107 108 109 110 111 112 113 114 115 116 117 118 119 120 121 122 123 124 125 126 127 128 129 130 131 132 133 134 135 136 137 138 139 140 141 142 143 144 145 146 147 148 149 150 151 152 153 154 155 156 157 158 159 160 161 162 163 164 165 166 167 168 169 170 171 172 173 174 175 176 177 178 179 180 181 182 183 184 185 186 187 188 189 190 191 192 193 194 195 196 197 198 199 200 201 202 203 204 205 206 207 208 209 210 211 212 213 214 215 216 217 218 219 220 221 222 223 224 225 226 227 228 229 230 231 232 233 234 235 236 237 238 239 240 241 242 243 244 245 246 247 248 249 250 251 252 253 254 255 256 257 258 259 260 261 262 263 264 265 266 267 268 269 270 271 272 273 274 275 276 277 278 279 280 281 282 | |
We copy this to the file /usr/local/bin/i-doit_provision.php. So that the Apache web server can execute the script, we set the appropriate permissions:
1 | |
This script contains the configuration for accessing both i-doit and VMware. These must be adjusted accordingly:
- $vSphereUsername: User for vSphere (see above)
- $vSpherePassword: Password for vSphere (see above)
- $vSphereWebService: URL to the vSphere web service
- $objCMDBStatus: ID of the CMDB status to be provisioned (see below)
- $objCMDBStatus_ready: ID of the CMDB status provisioned (see below)
- $api_entry_point: URL to the i-doit API
- $api_key: Key for the i-doit API
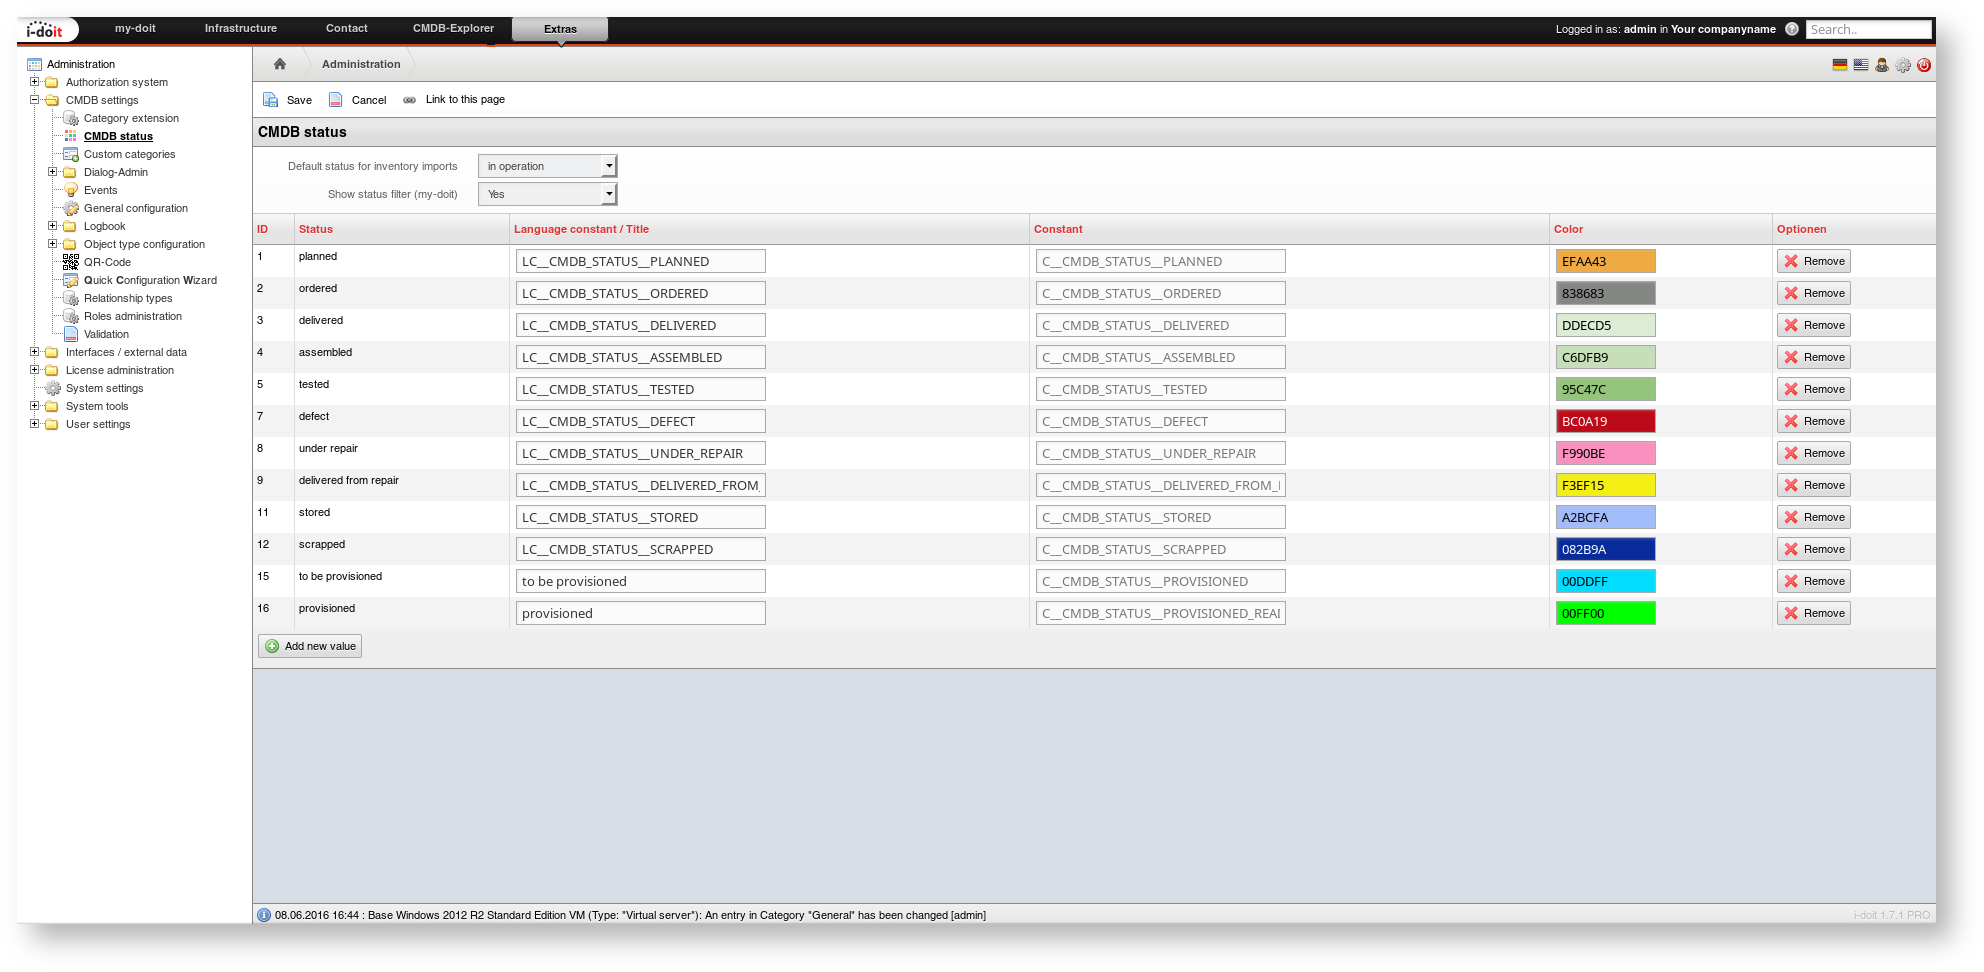
Adding CMDB Status#
The two CMDB status entries "to be provisioned" and "provisioned" do not yet exist in the standard installation of i-doit, but are crucial for the automation. These must be added as described in the linked article.
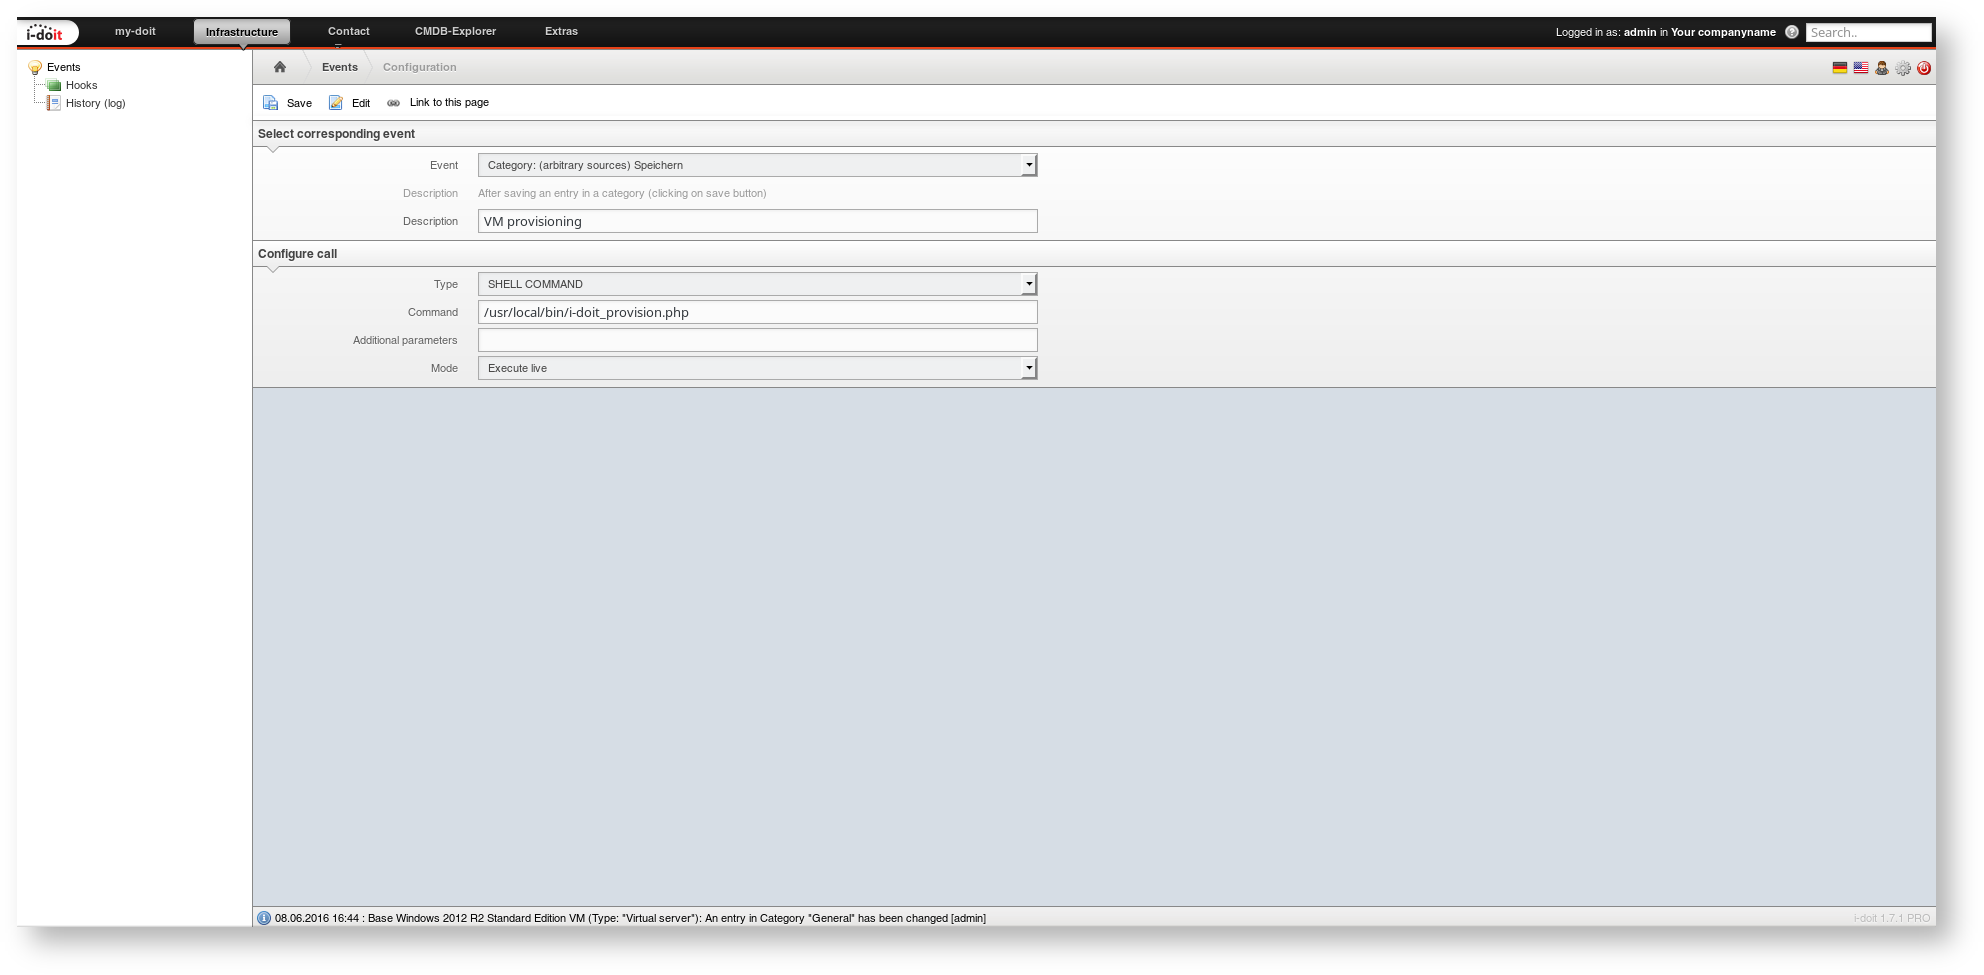
Configuring the Event#
Now we need to configure in i-doit that the script is called when certain changes occur. For this, we use the event control and create a new hook:
- Event: Category: (arbitrary sources) Save
- Description: VM provisioning
- Type: SHELL COMMAND
- Command: /usr/local/bin/i-doit_provision.php
- Additional parameters: leave empty
- Mode: Executive live
At this point, the configuration is complete and the automation is "armed".
Usage#
After the extensive, fortunately one-time configuration, let us look at how the automation works.
Documenting the Virtual Environment in i-doit#
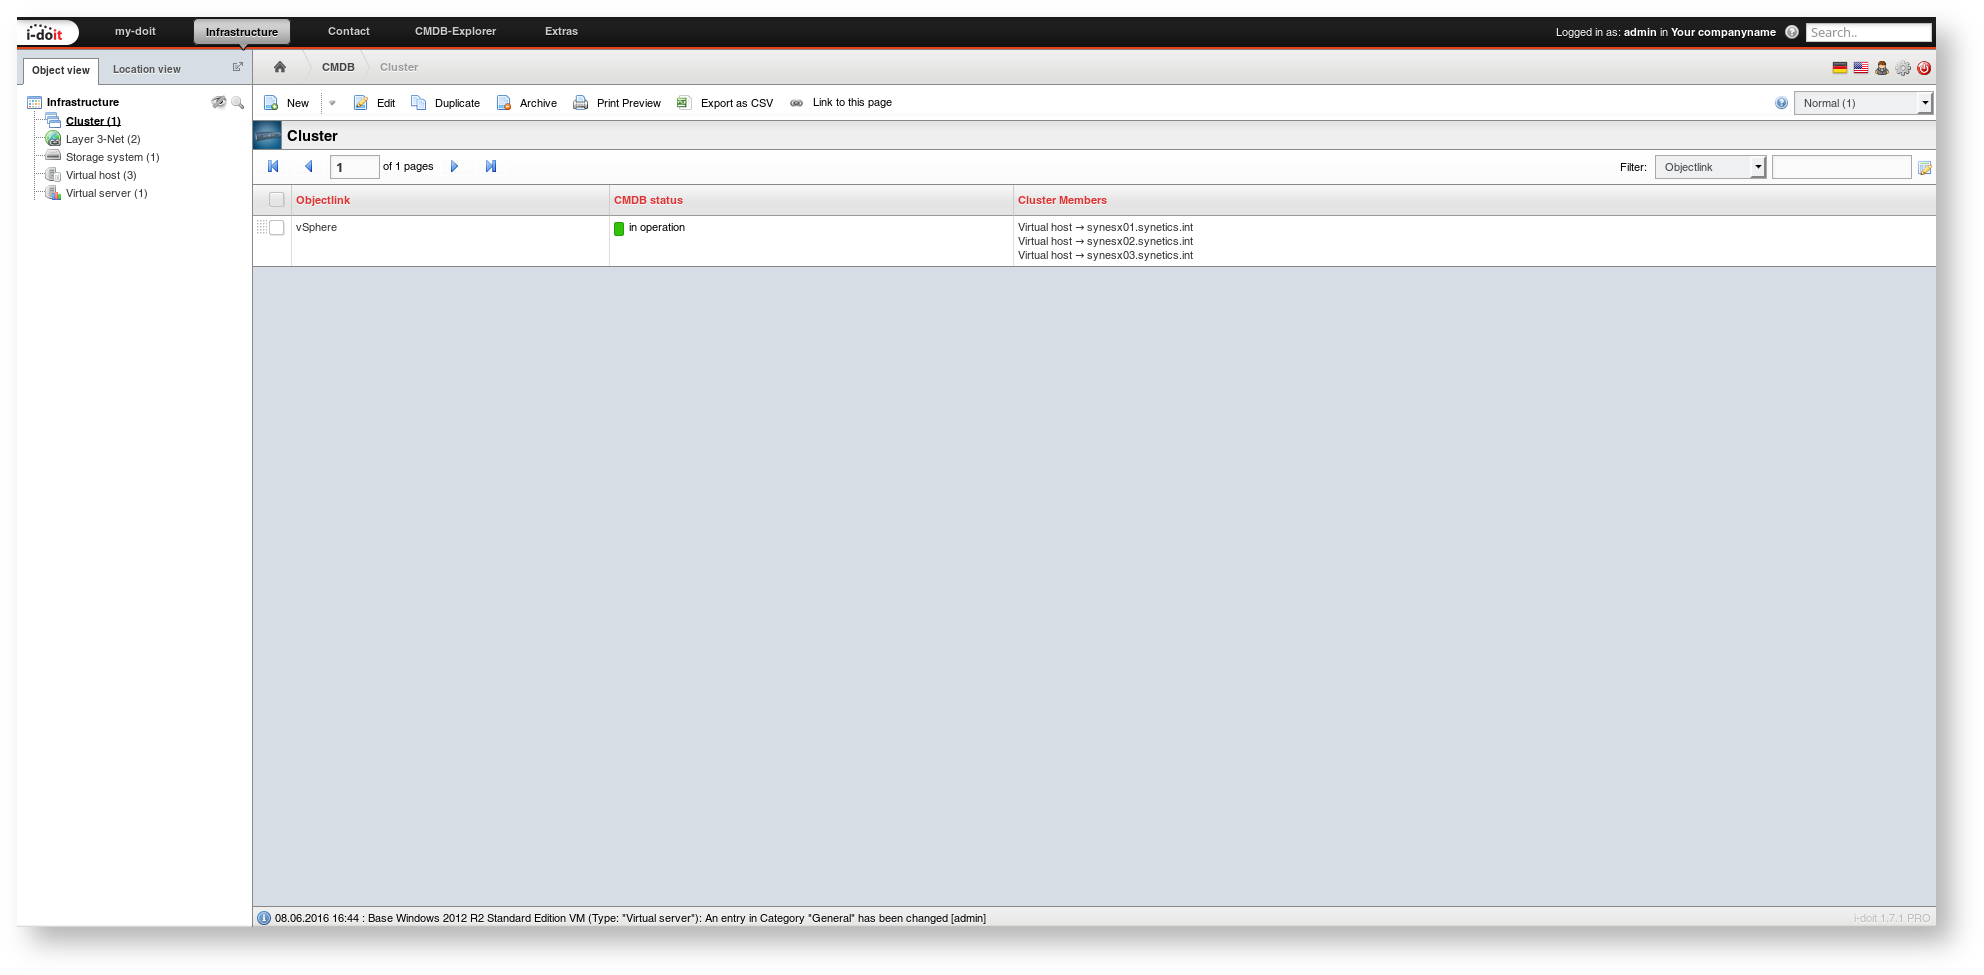
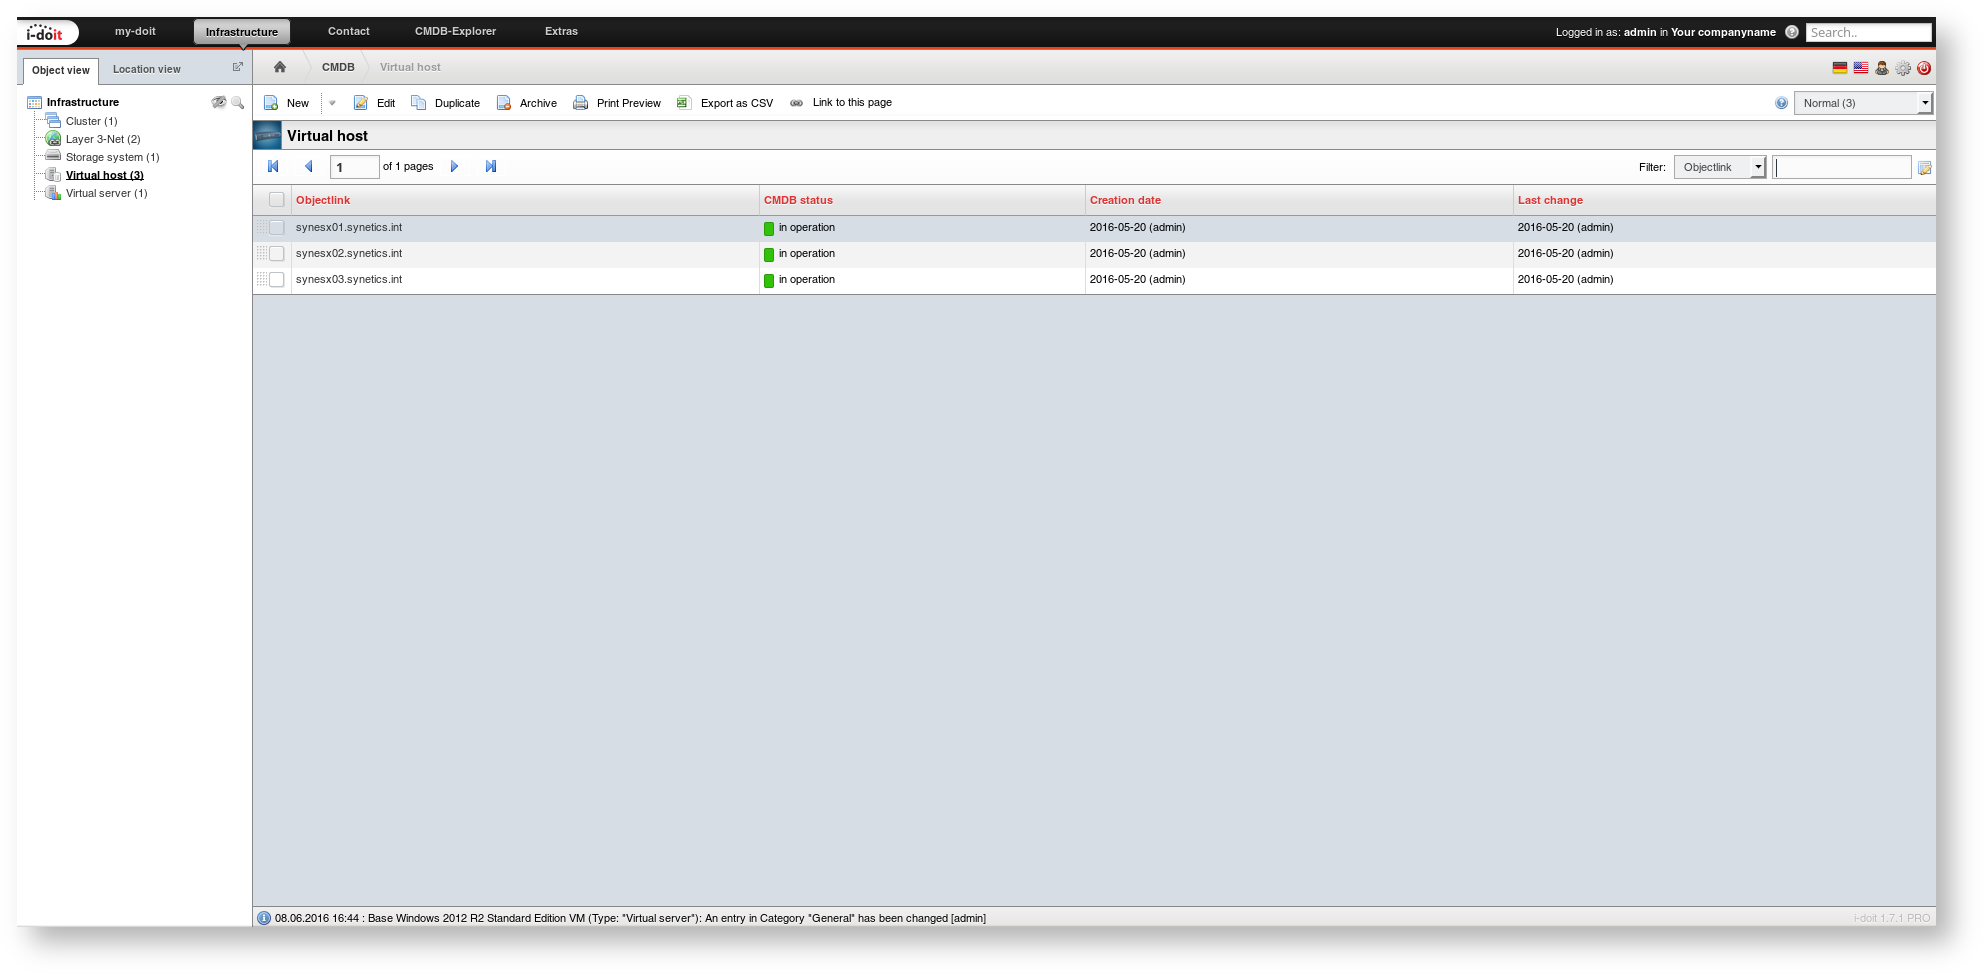
A vSphere cluster (object type Cluster) already exists with several ESX hosts (object type Virtual Host). The object title of the cluster corresponds to the datacenter in vSphere. The object titles of the ESX hosts are the hostnames also displayed in vSphere.
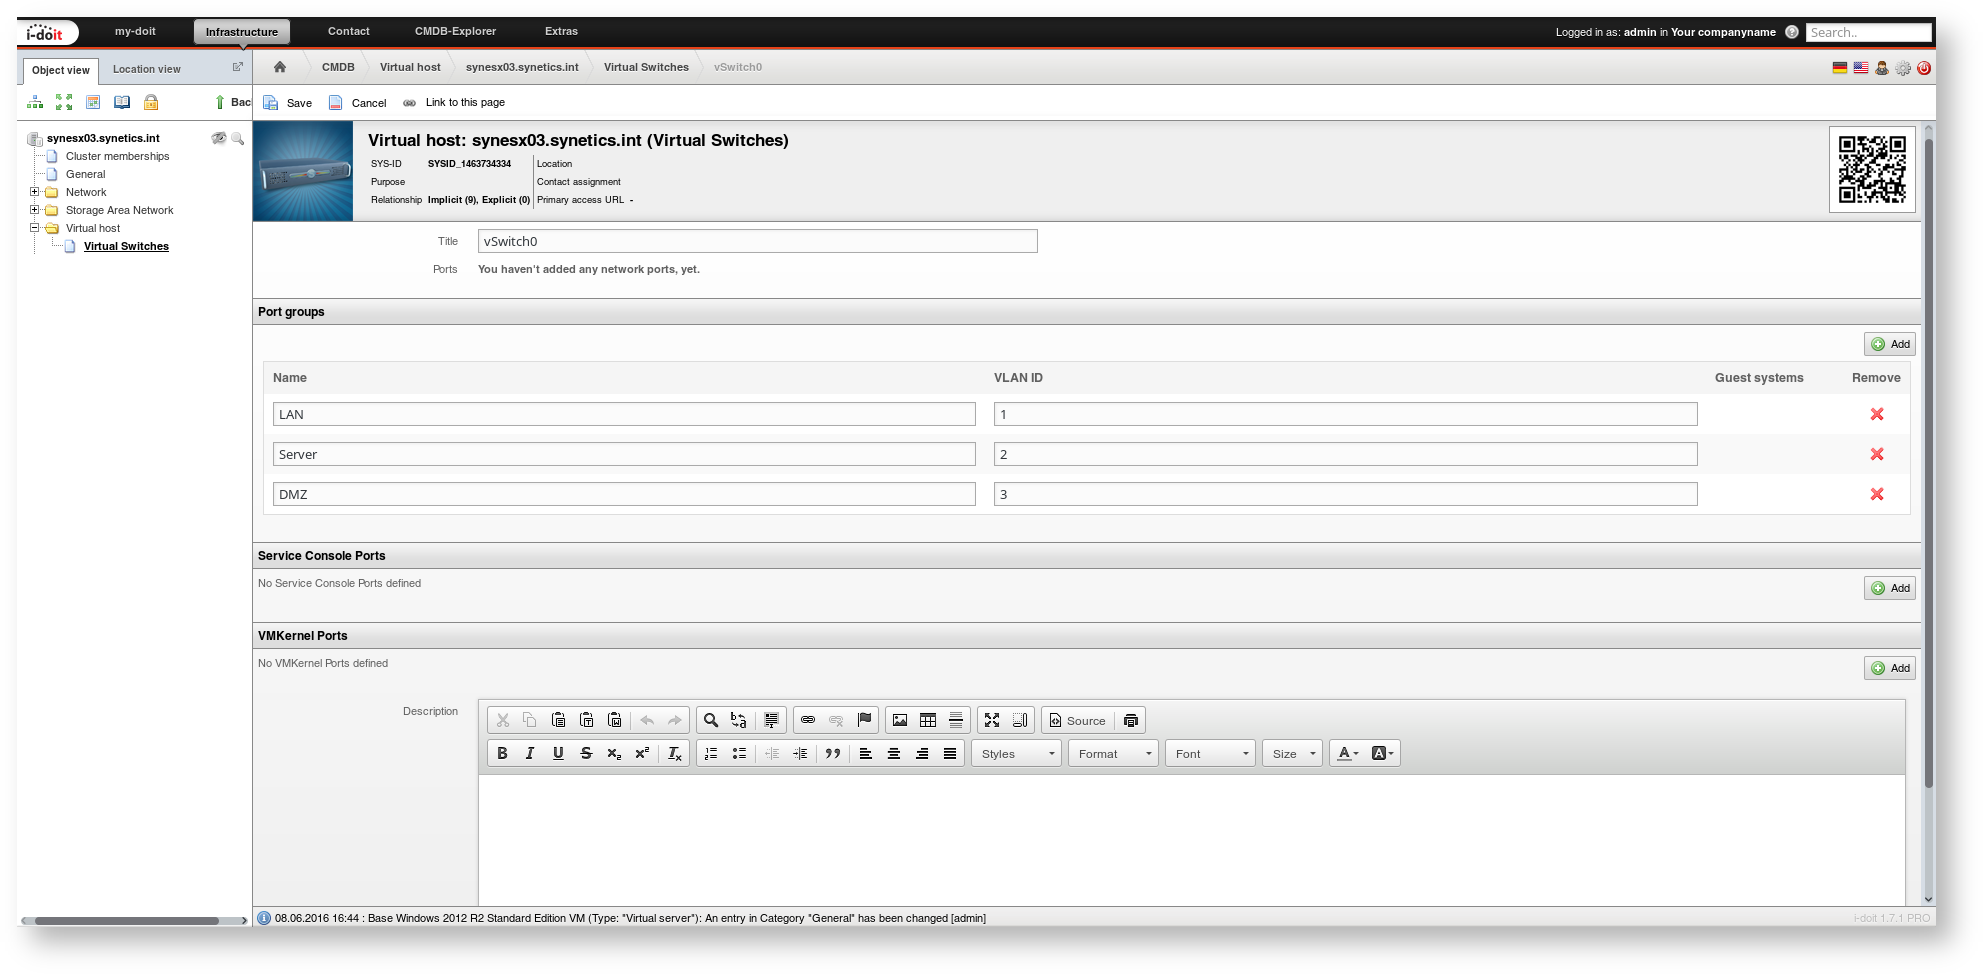
Virtual switches with VLAN IDs are configured per ESX host (category Virtual Switches).
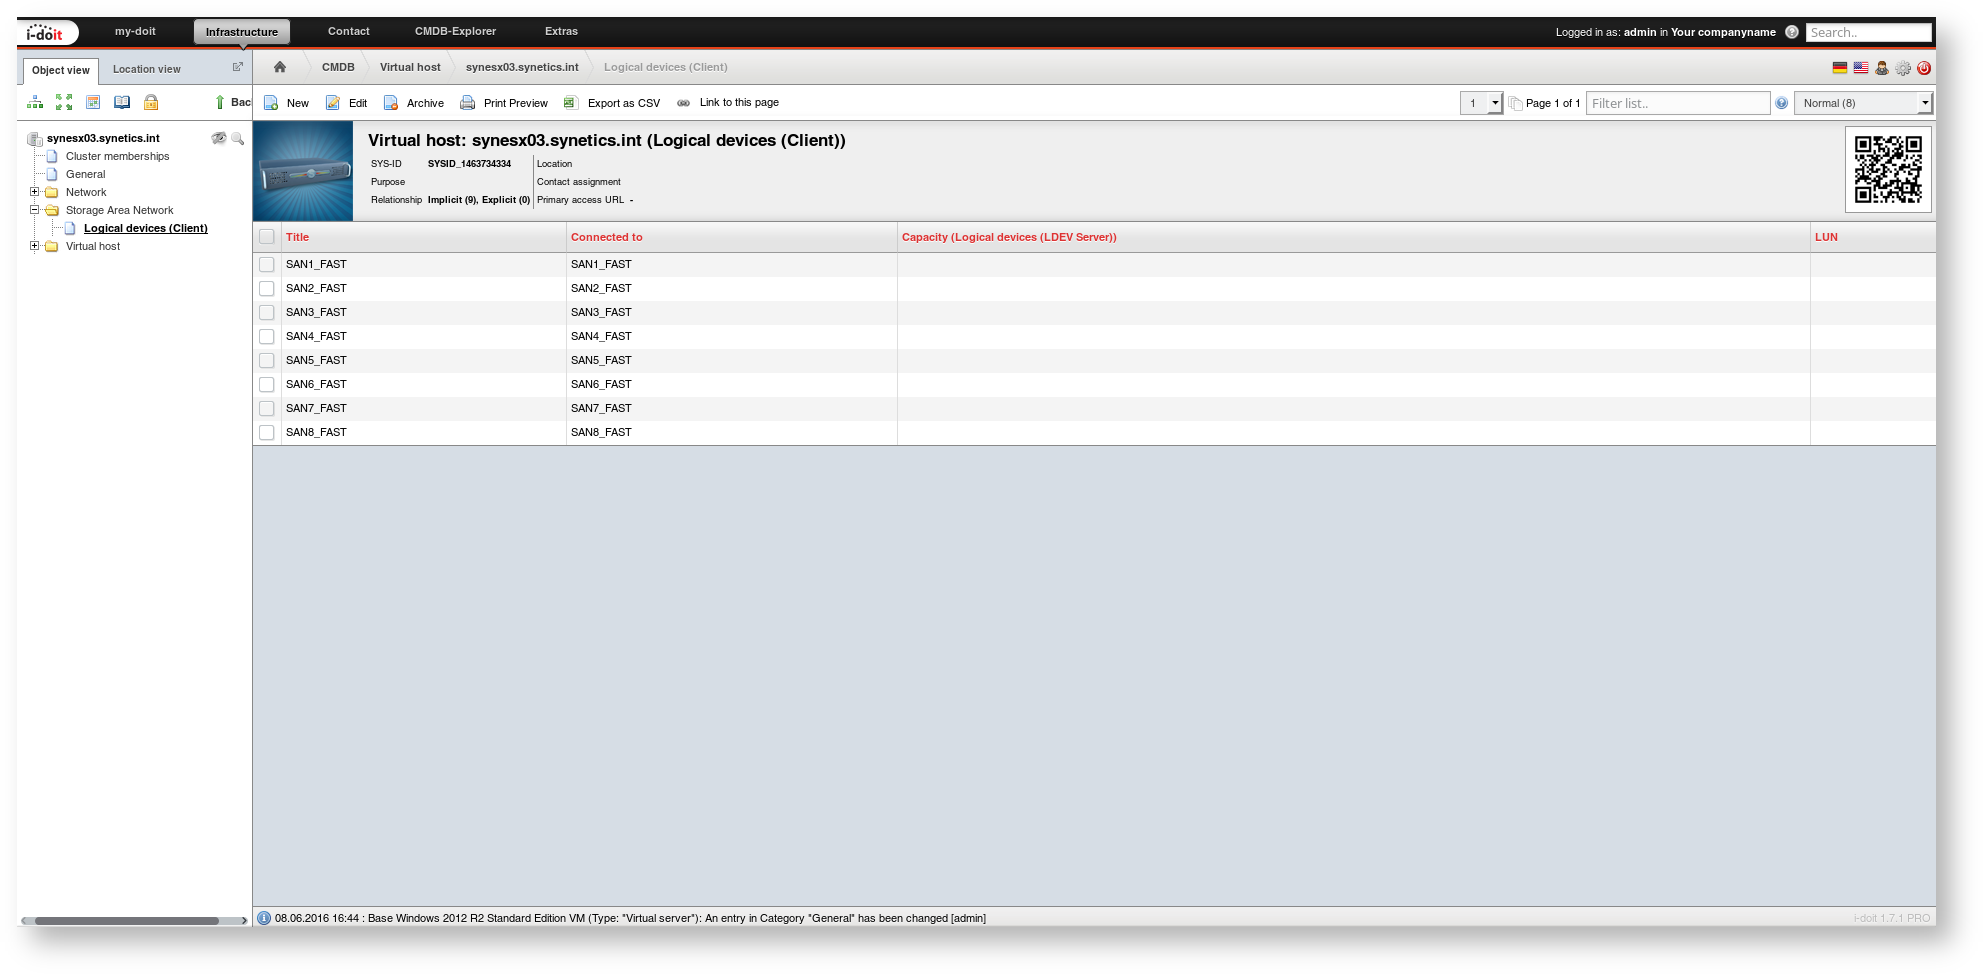
The ESX hosts are connected to a central storage. Through this, the VMs are supplied with disk space (category Logical Devices (Client)).
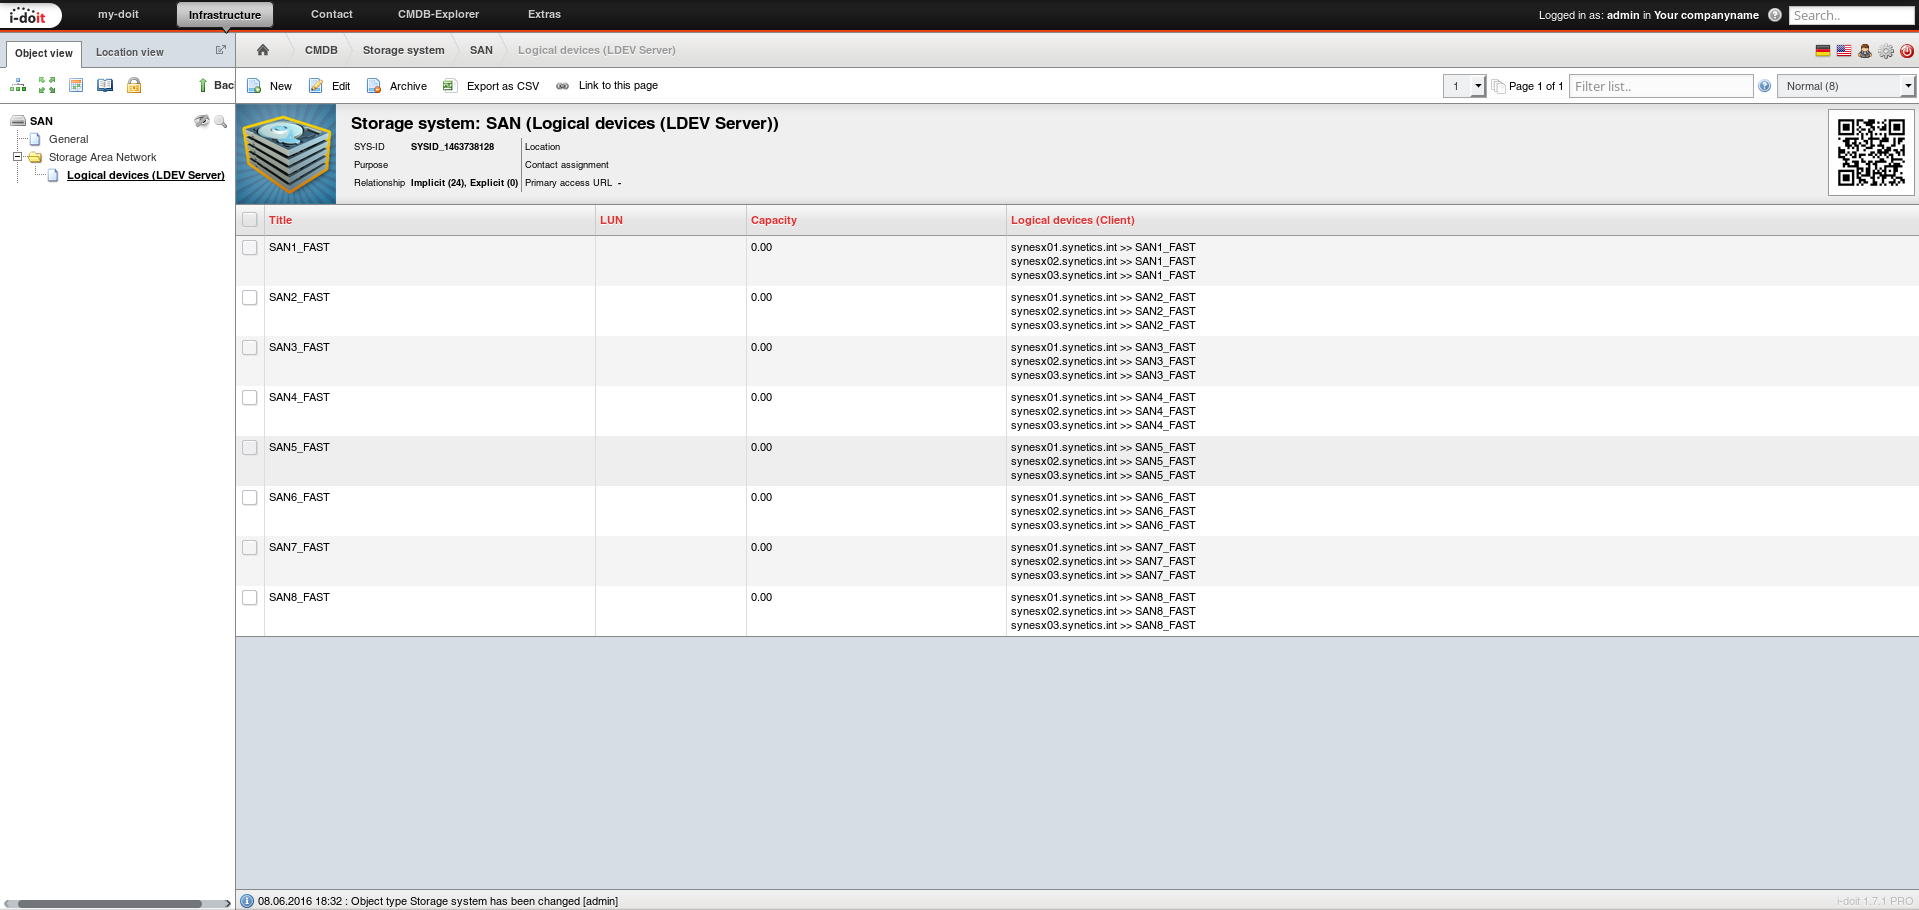
On the storage side, it looks accordingly. The Logical Devices (LDEV Server) category contains the assignment of LUNs to ESX hosts.
Creating a New VM#
The vSphere cluster and storage are now ready according to the IT documentation. It is time to document VMs -- and automatically provision them.
First, create a new VM (object type Virtual Server) and set it to the CMDB status "planned" (it does not exist yet).

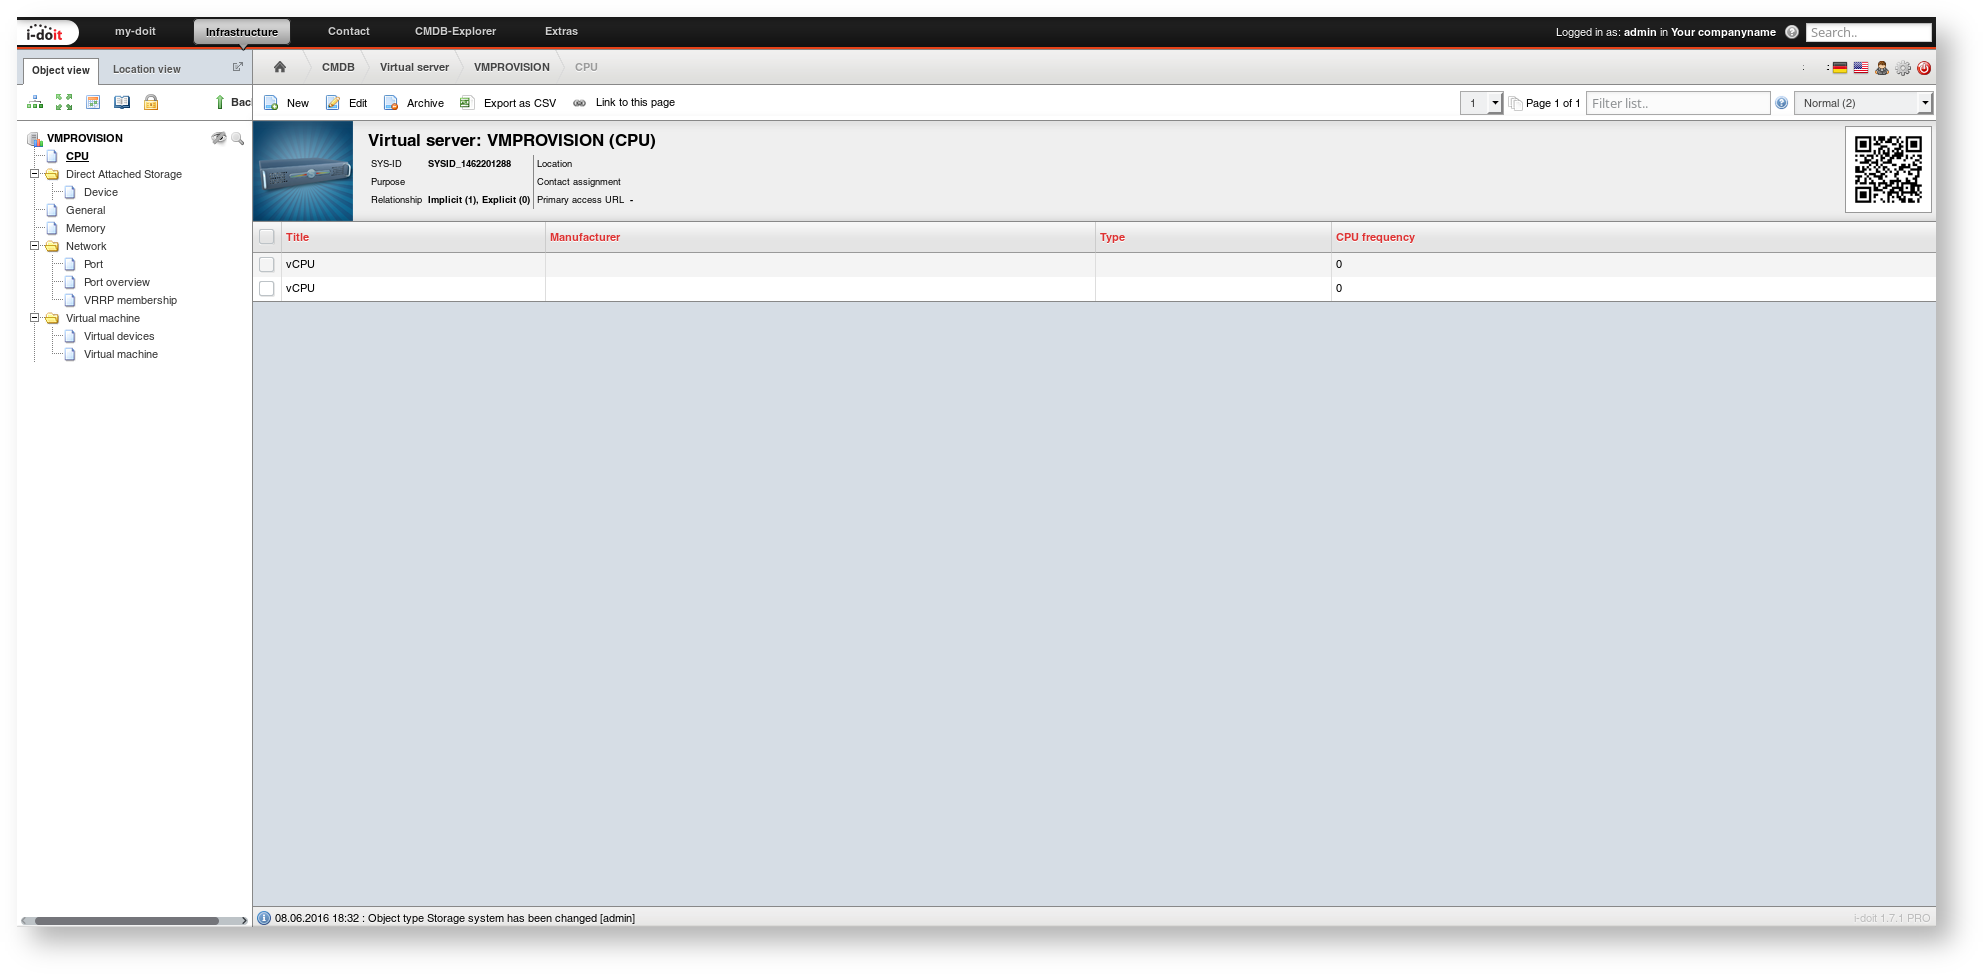
Then the desired system configuration is documented. In the CPU category, the number of required CPU cores is documented. An entry is created for each core.
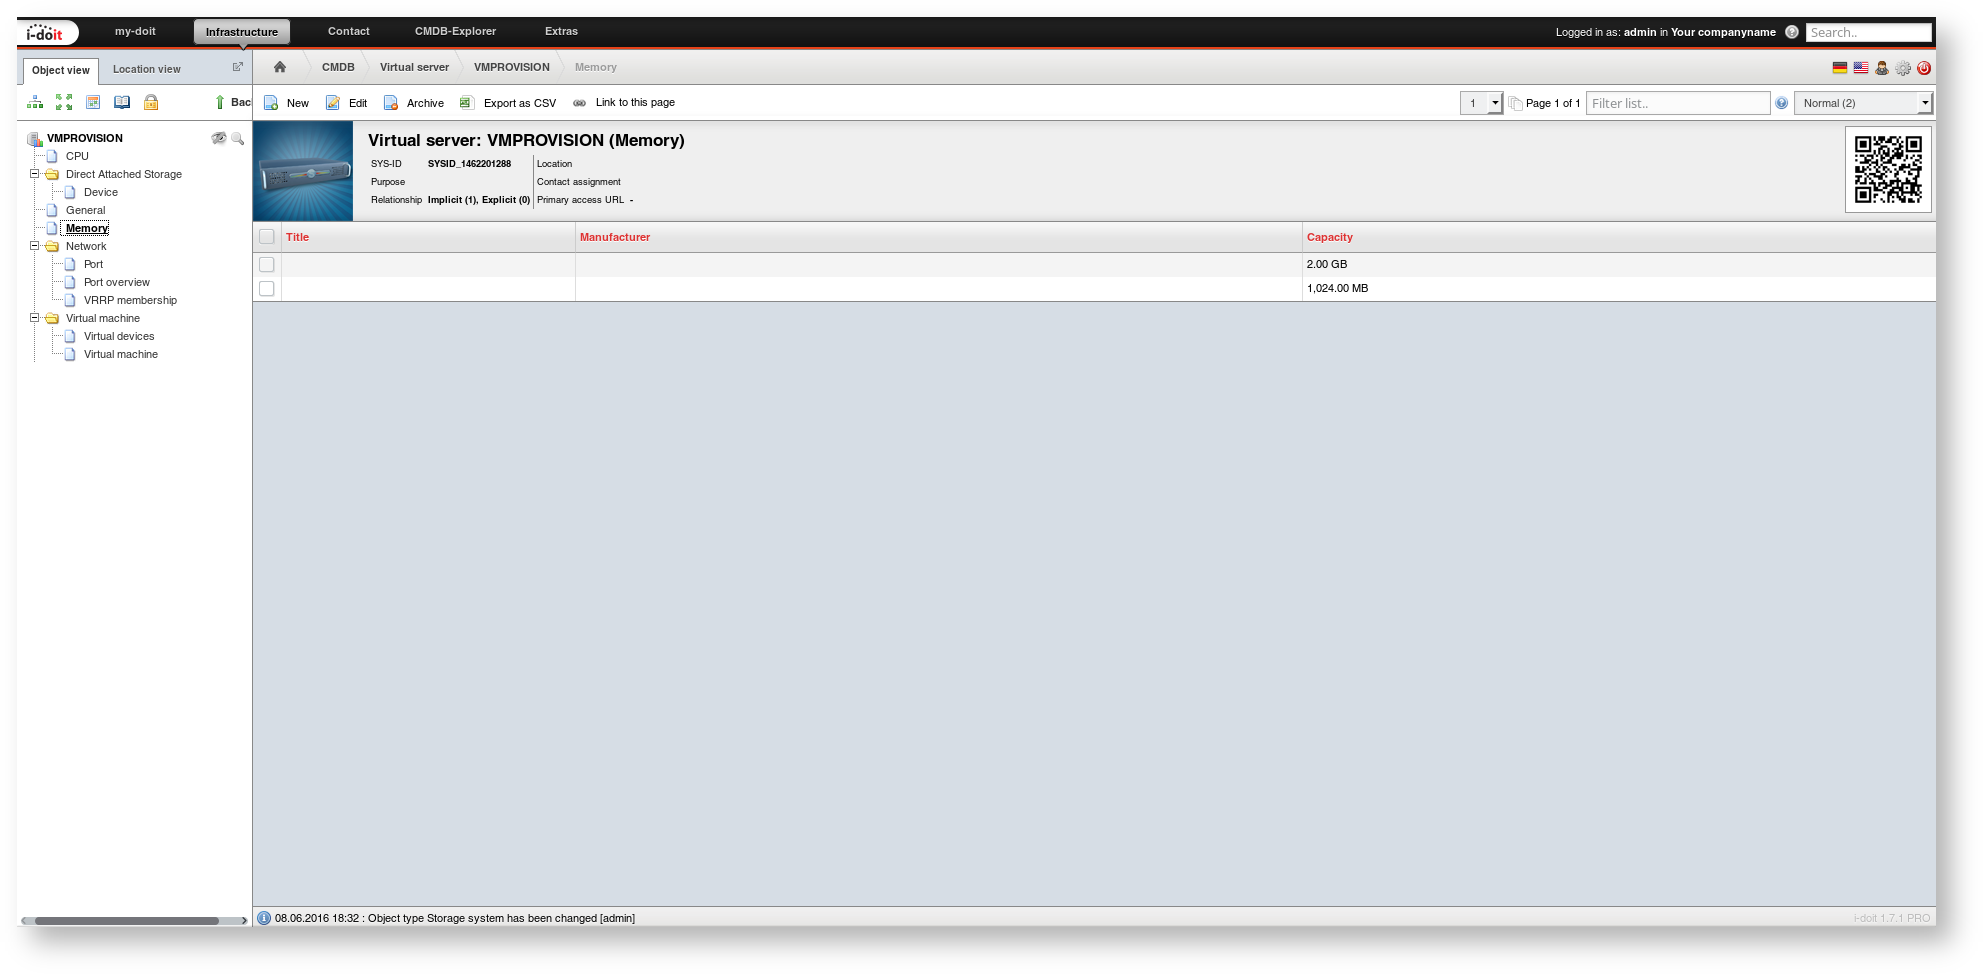
In the Memory category, the required RAM is documented. The number of memory modules and chosen size units do not matter. Instead, the total capacity is summed up.
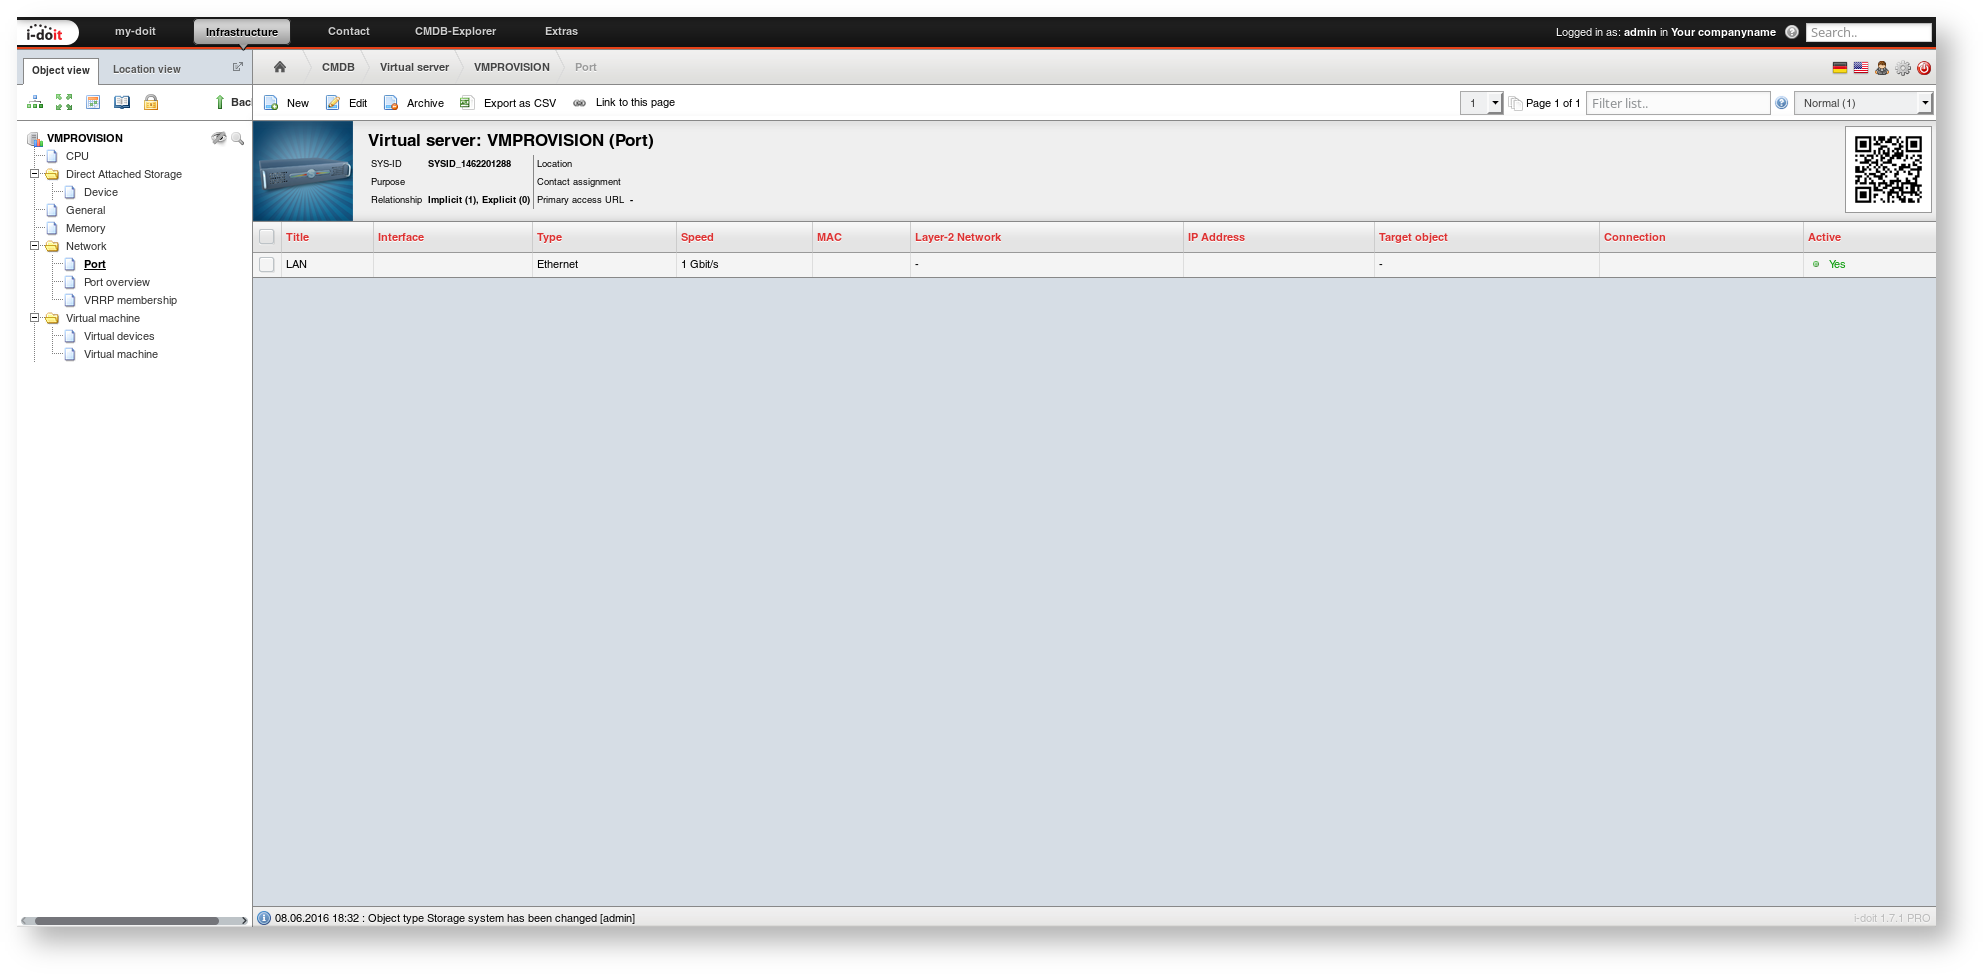
In the Network > Port category, the name of the first entry is used to configure a virtual port for the VM.
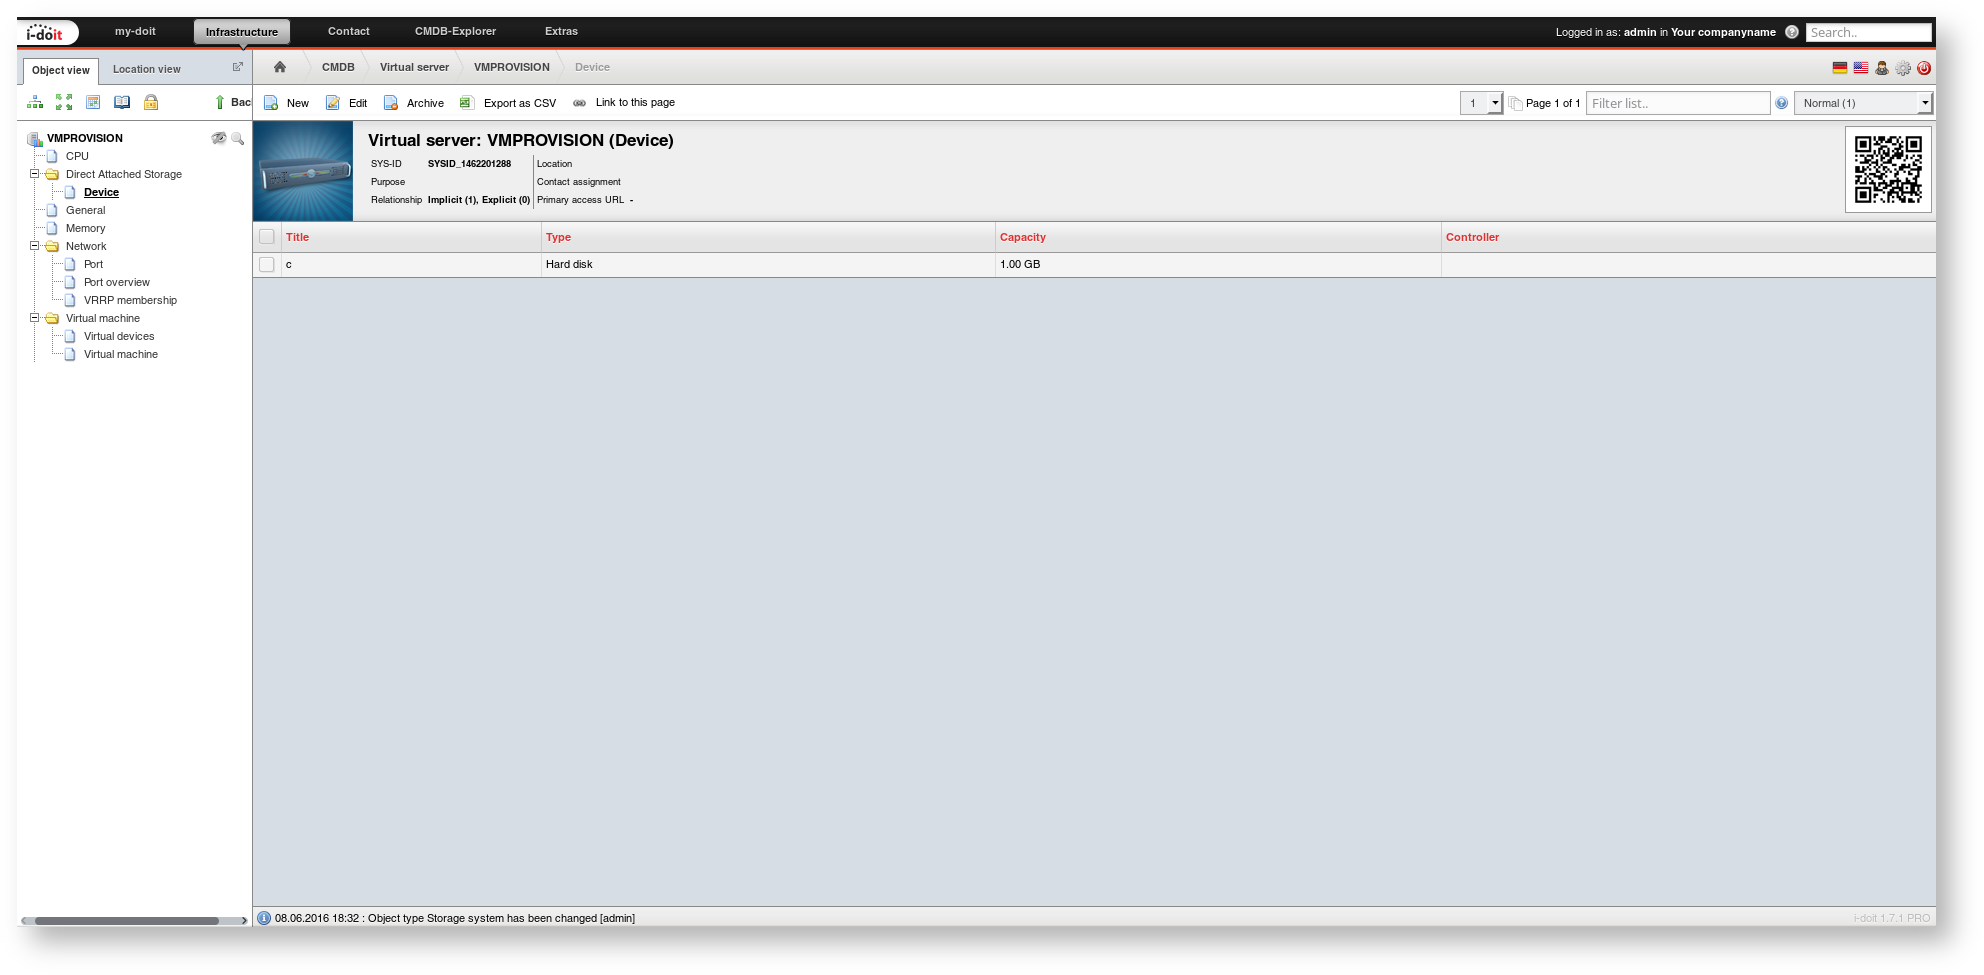
The required disk space is specified in the Local Mass Storage > Device category.
Which cluster and which ESX host the VM should run on is documented in the Virtual Machine category.
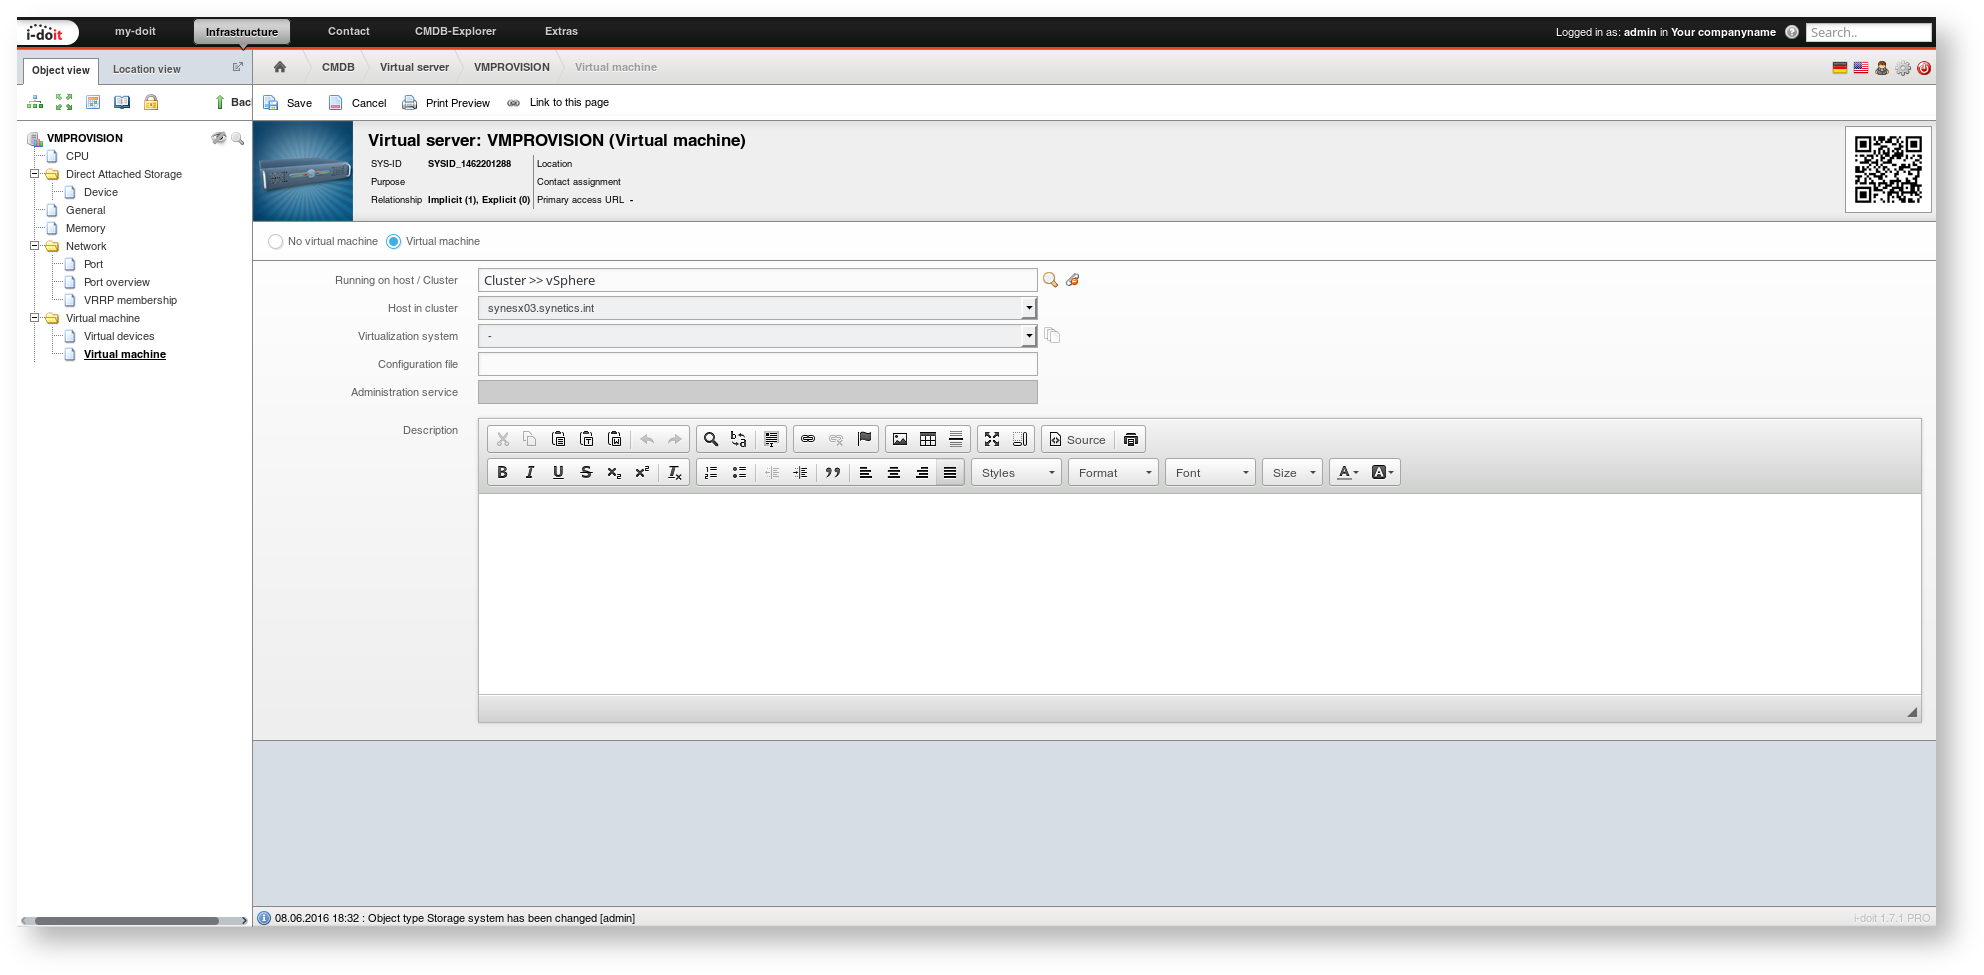
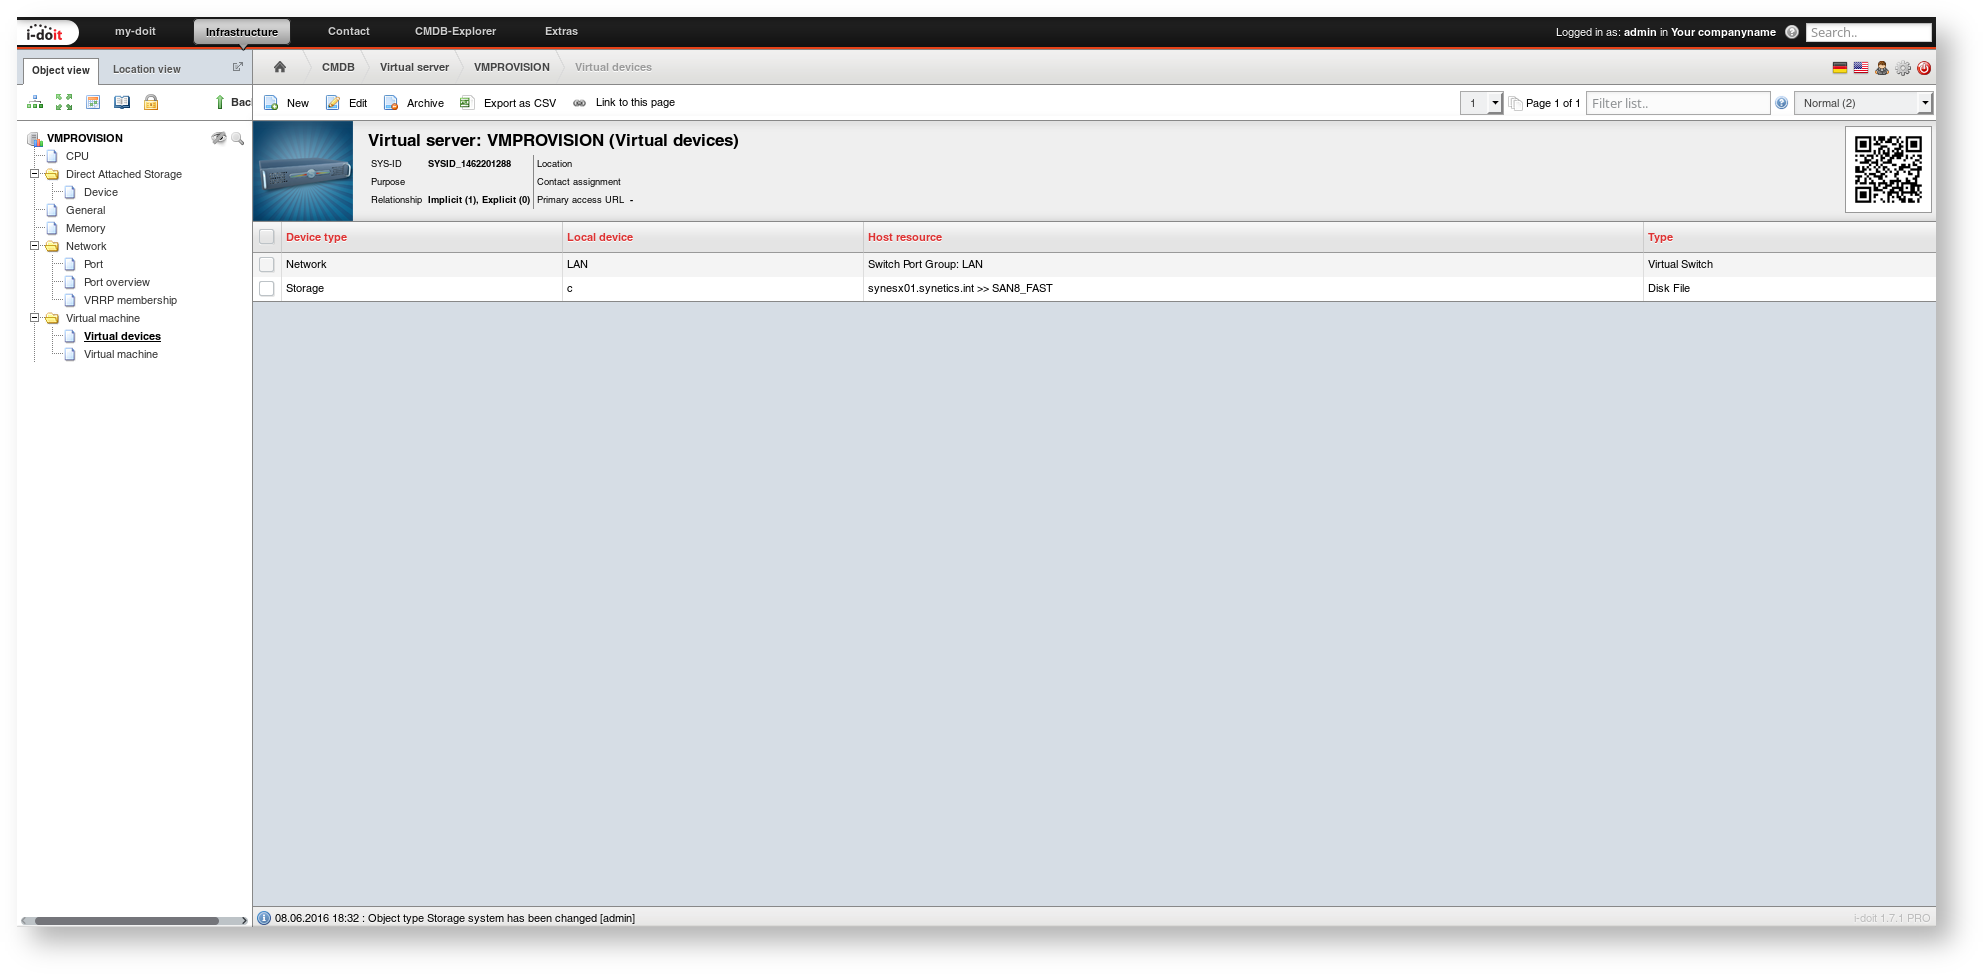
The assignment of storage and network is stored in the Virtual Machine > Virtual Devices category. The screenshot shows which attributes should be filled in.
The VM configuration is now sufficiently documented.
Template
To document and thus provision virtual machines more quickly, a template is suitable. A template is created for each preconfigured VM, and new objects are created from it.
Automatically Provisioning the VM#
Now we come to the final step: provisioning. There is not much left to do. In the General category, the CMDB status is set to to be provisioned. When the change is saved, the script described above starts reading the configuration data from i-doit and passing it to vSphere. This may cause the save to take a bit longer because it waits for the result.

If the provisioning was successful, the CMDB status automatically changes to provisioned. The VM has been created and is running. Done!

The communication between i-doit and vSphere is displayed under Administration > Add-ons > Events > History (Log).