Azure AD (SAML) authentication#
Please create a complete backup before making any changes to an interface/import. If the result is not satisfactory, the backup can then be restored
This guide describes the setup of Single Sign-On (SSO) for i-doit with SAML. Mellon is used as the authenticator against Azure AD.
Preparations#
The example configuration uses a Debian 11 server with Apache, Mellon, and i-doit already installed.
Basic configuration#
✔ This guide assumes that your Azure Active Directory has already been properly configured.
✔ i-doit is already pre-installed and usable.
Install packages#
1 | |
An x86 64-bit system architecture should be used
Mellon Configuration#
Create a directory under /etc/apache2 for the configuration data.
1 2 | |
Create the Mellon metadata with the following command (adjust the URLs to your environment):
1 | |
This command creates the following files:
1 2 3 | |
Create the Mellon configuration:
1 | |
Insert the following directives:
1 2 3 4 5 6 7 8 | |
Apache2 Configuration#
First create a self-signed certificate (the name can be chosen freely):
1 | |
Example:
1 2 3 4 5 6 7 | |
Create a VHost:
1 | |
Example configuration:
1 2 3 4 5 6 7 8 9 10 11 12 13 14 15 16 17 18 19 20 21 22 23 24 | |
In this example, the directory /var/www/html/i-doit where our i-doit is located is protected via Mellon.
Enable SSO login for i-doit#
Open the System settings tab in the Admin Center and adjust the configuration as follows:
Important information about contacts
The email address of the respective user must be stored as the login in i-doit!
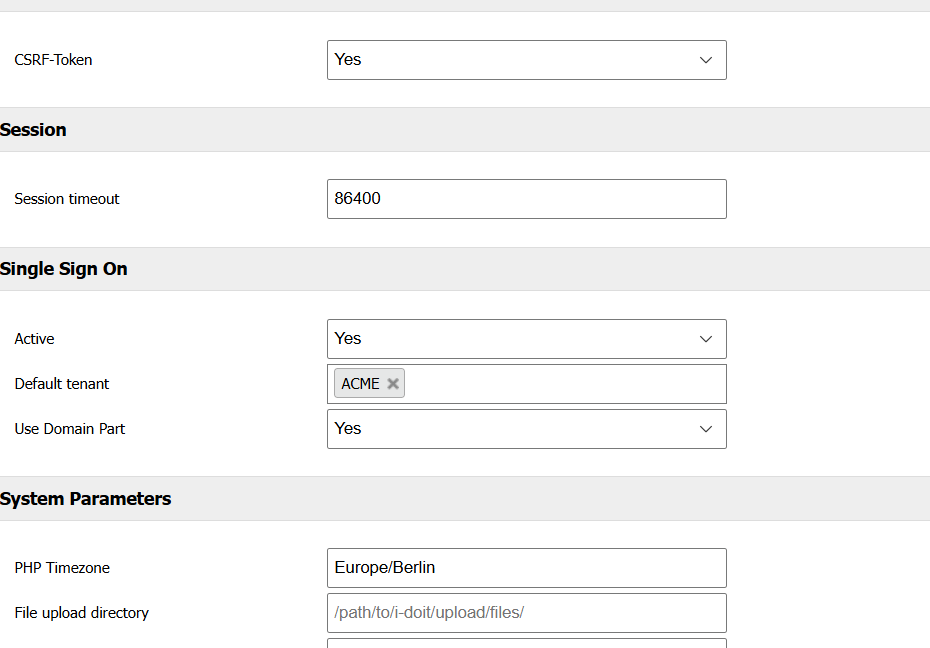
As long as the configurations on the Linux server have not been enabled yet, users can still log in with the i-doit login form and a local user.
Azure AD (SAML)#
To obtain the required XML for the Mellon configuration, perform the following steps:
Creating a custom enterprise application#
Log in to Azure AD and navigate to Enterprise applications.
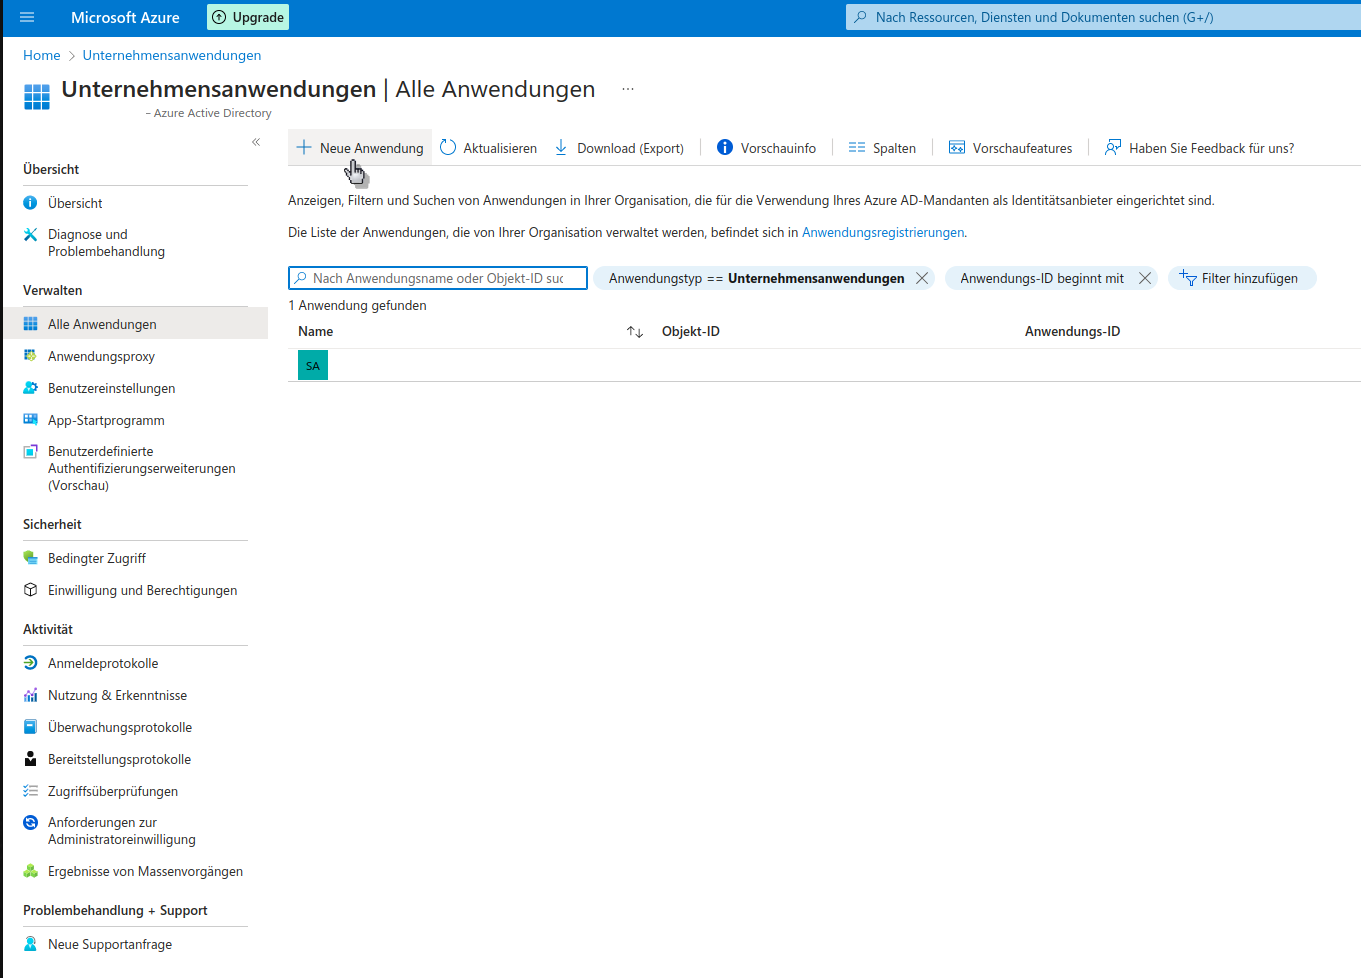
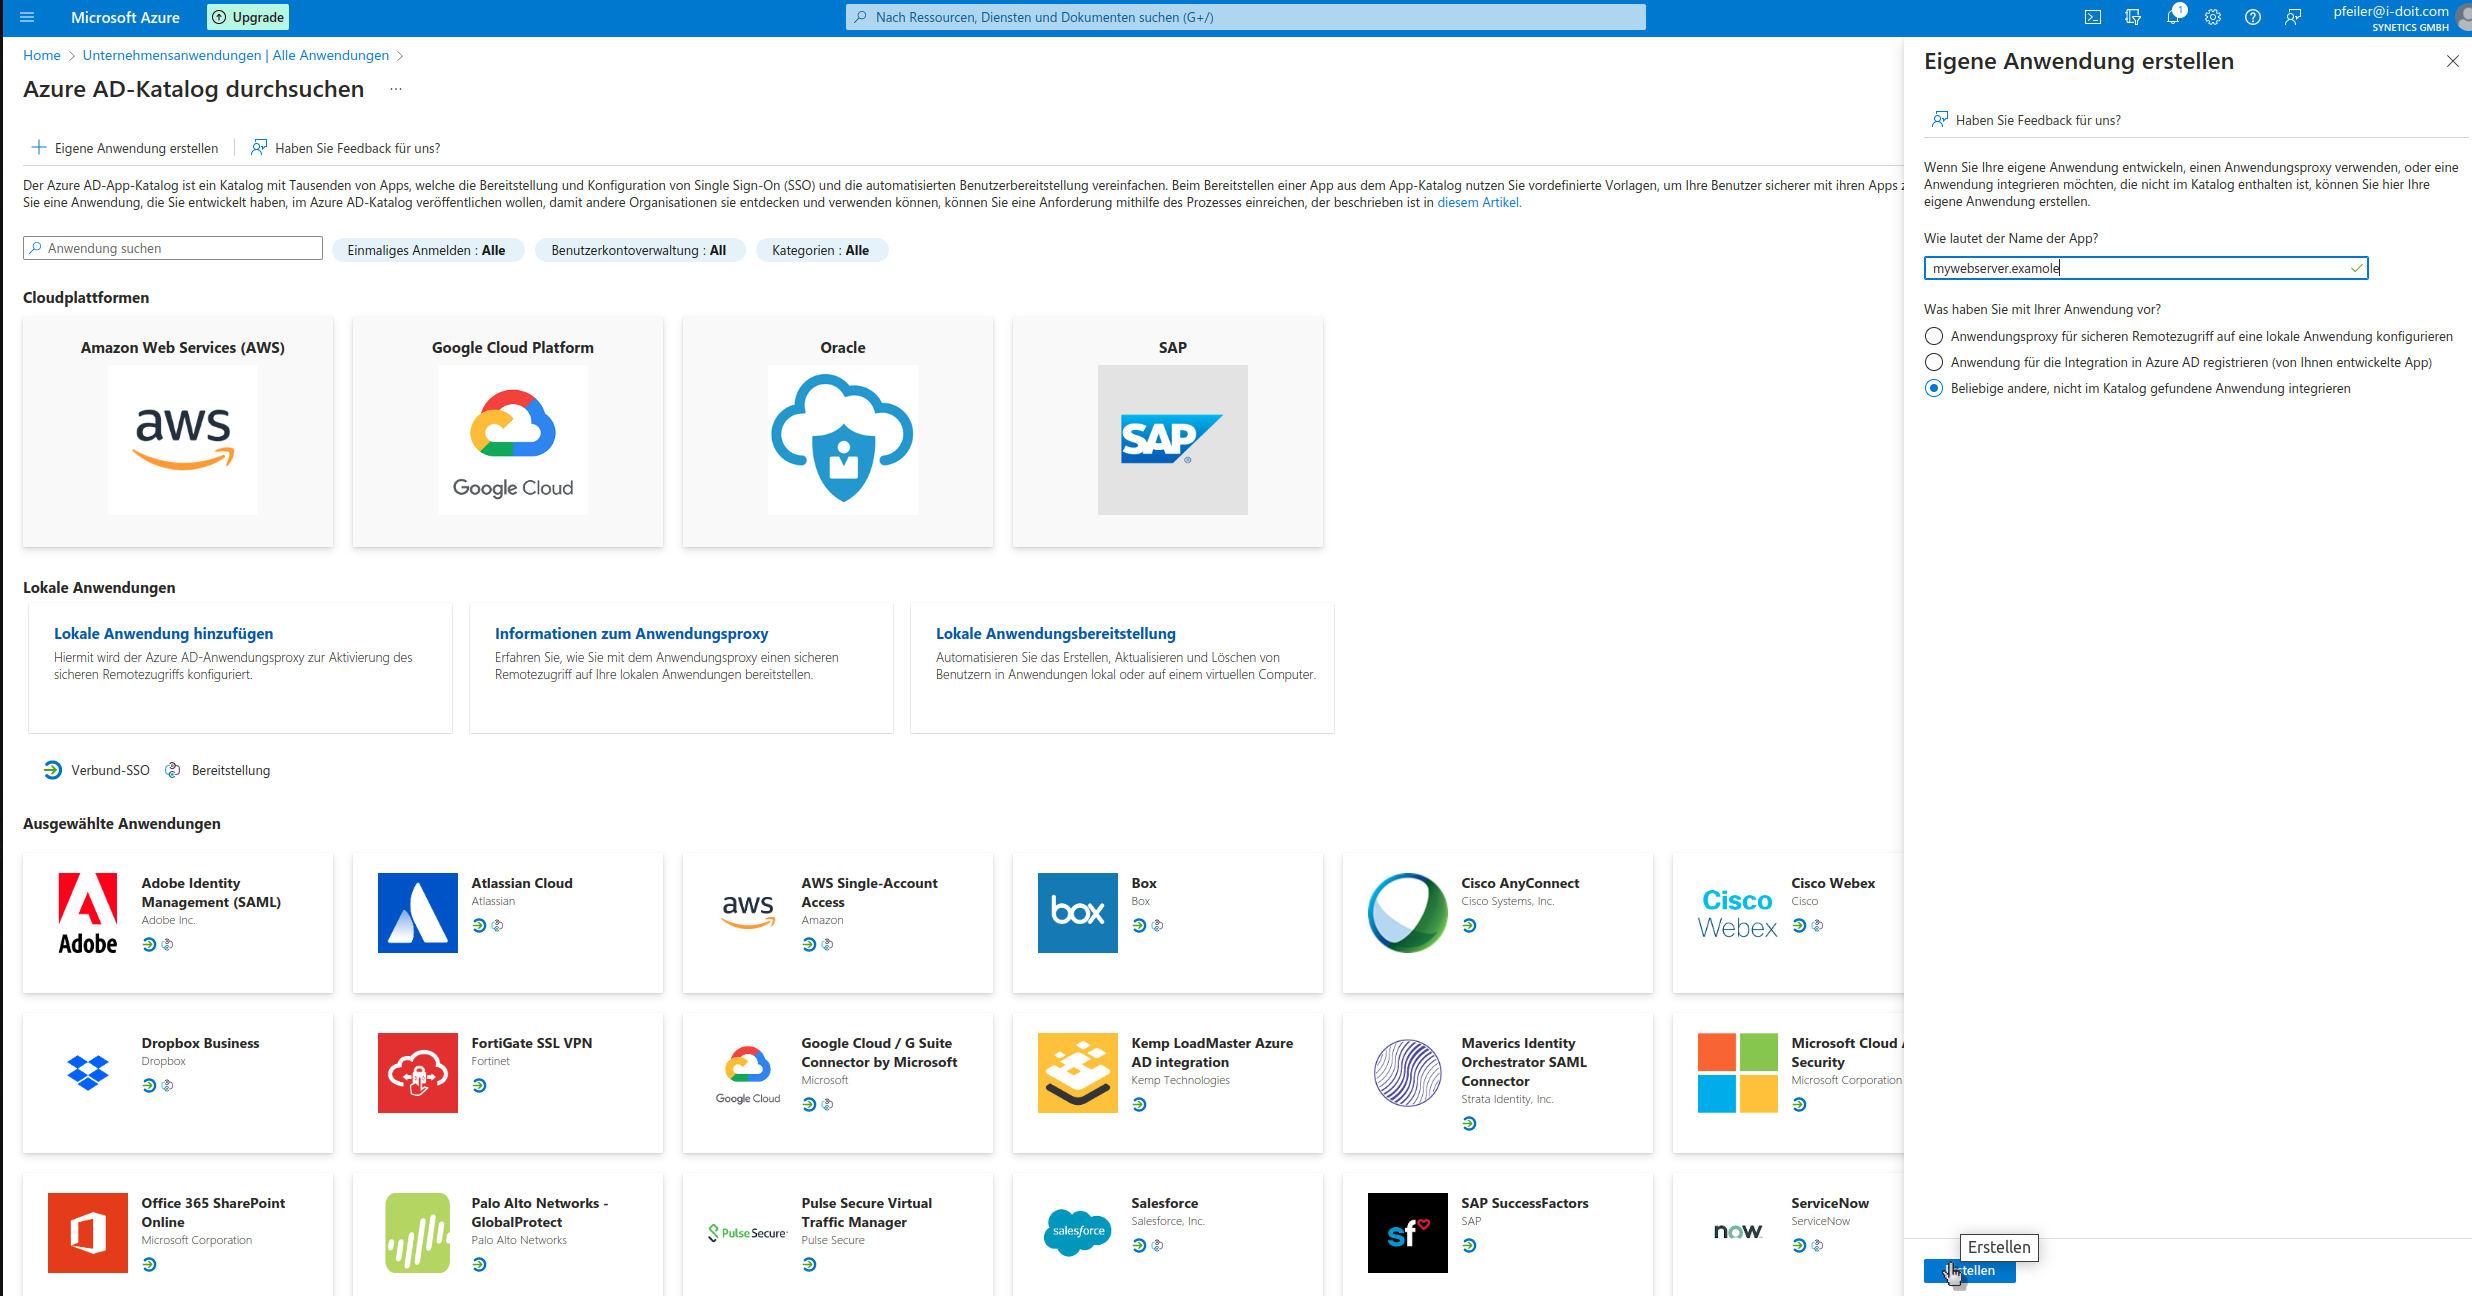
Create your own custom application.
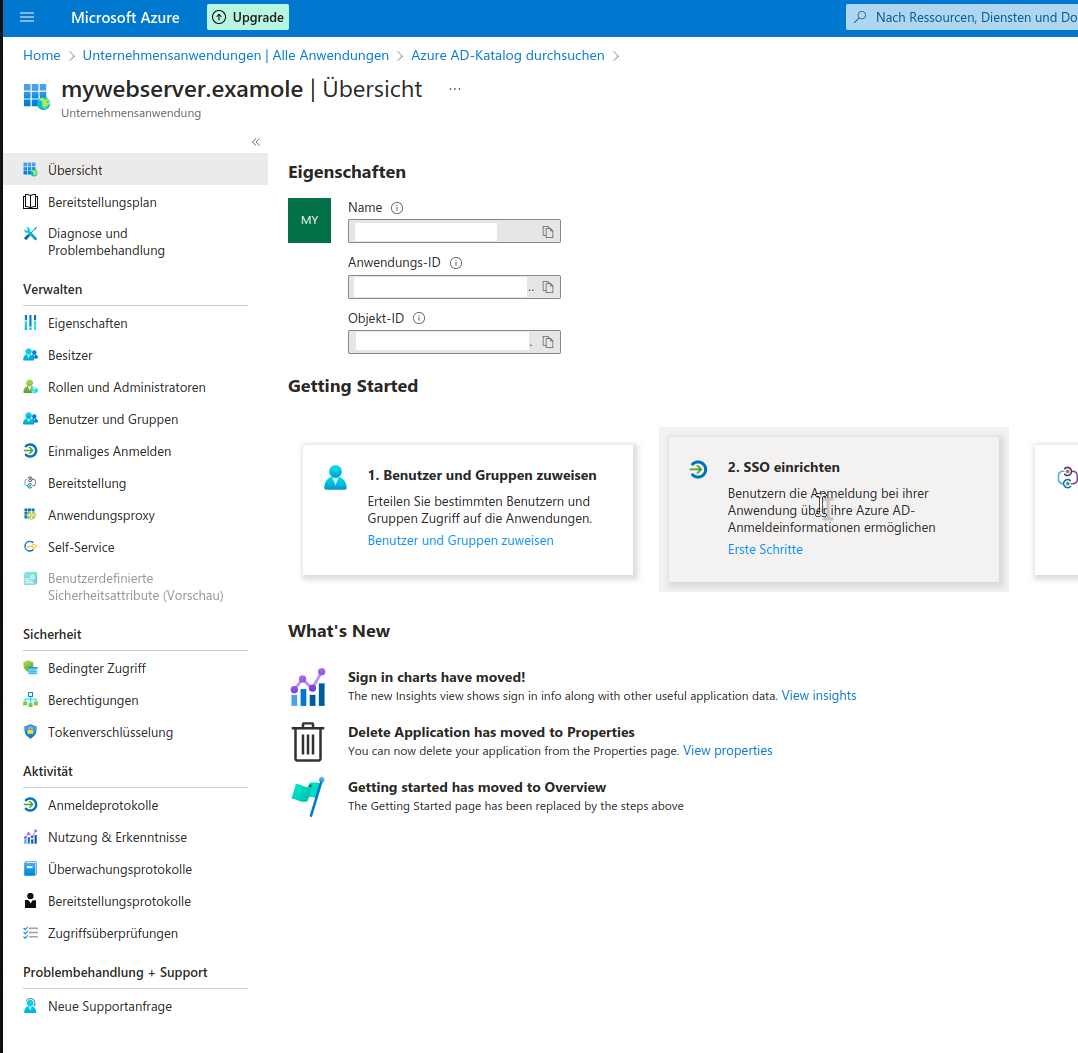
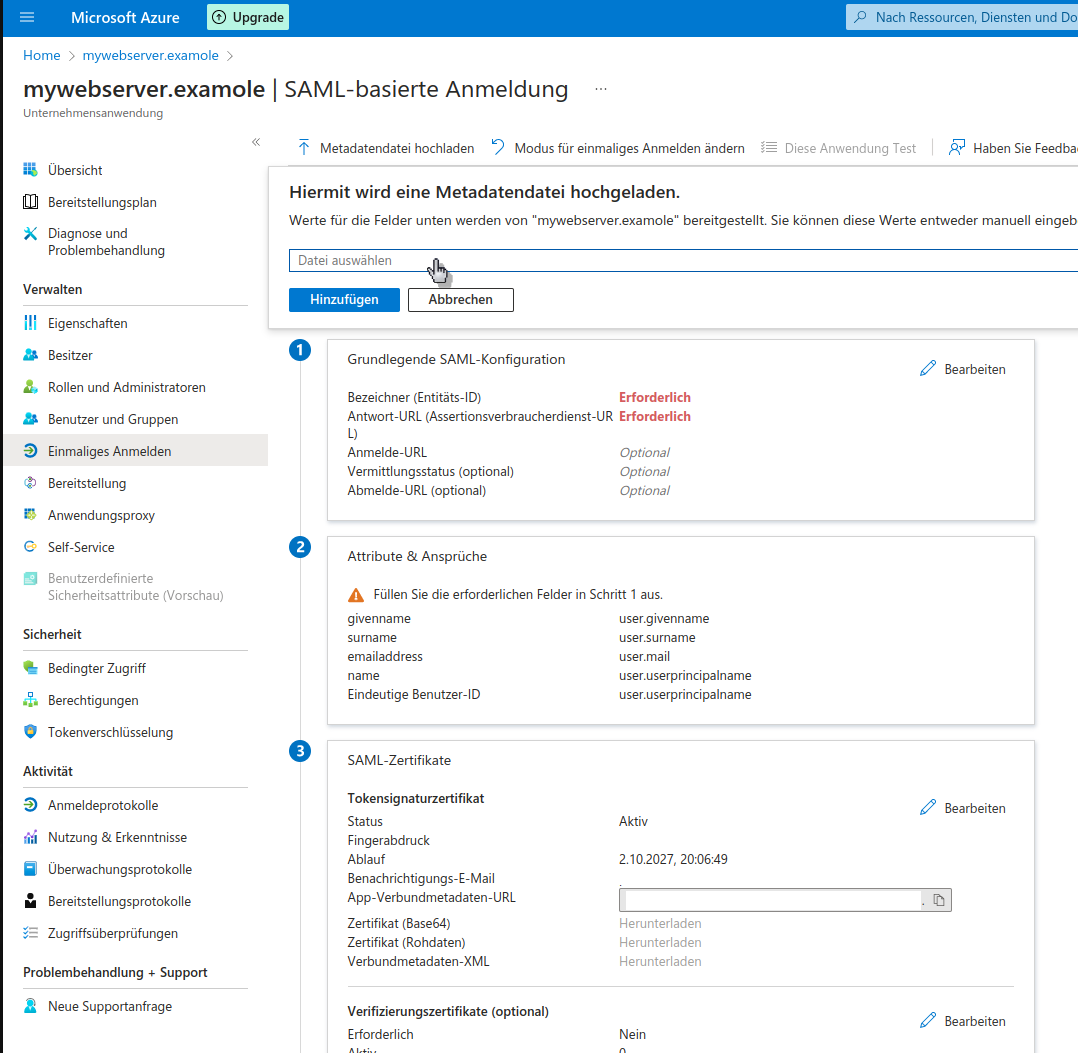
Set up SSO.
Select the method SAML and in the next step provide the file https_tu2_samlsso.synetics.test_.xml by clicking Upload metadata file.
https_tu2_samlsso.synetics.test_.xml
The file was created during the Meelon configuration and must be downloaded beforehand.
Save the configuration.
Test
If a message appears asking whether the configuration should be tested, please confirm with the button No, I will test later

Then download the metadata XML -- you will need it in the further process.
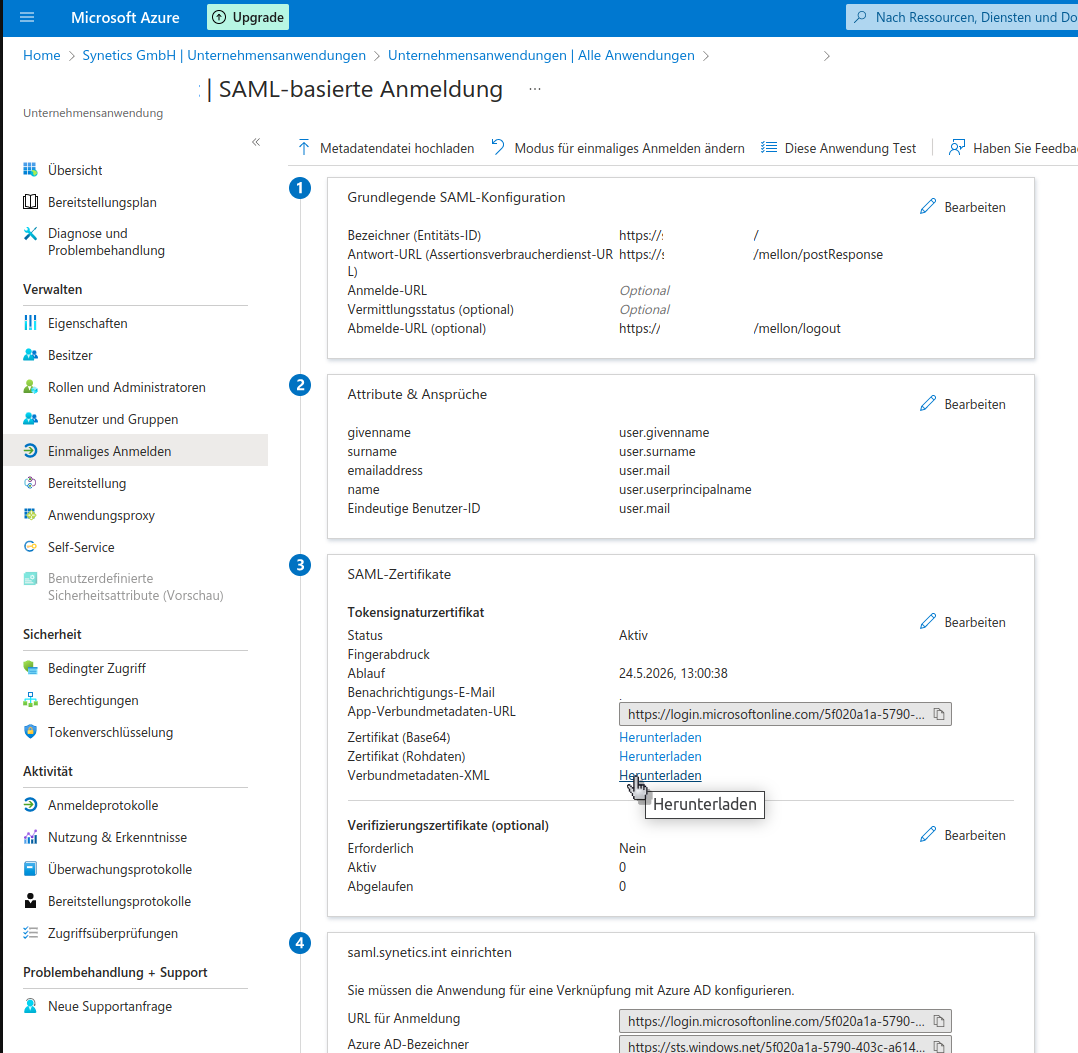
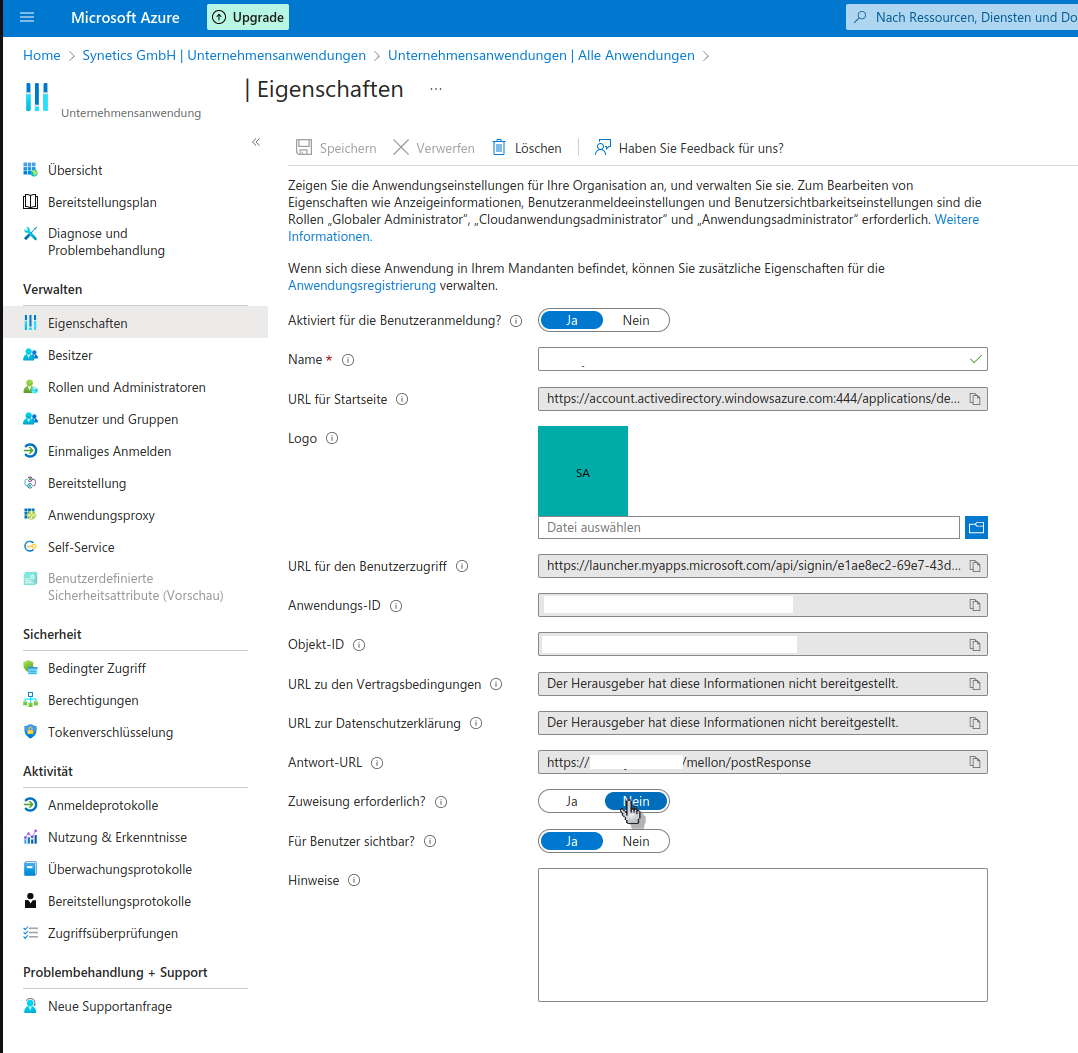
Adjust the assignment so that users have access to the enterprise application.
Finally, adjust the unique user identifier so that Mellon can forward the user's email address to i-doit.
To do this, open the Single sign-on section in the enterprise application administration. In the main area you will find Attributes and Claims -- edit these.
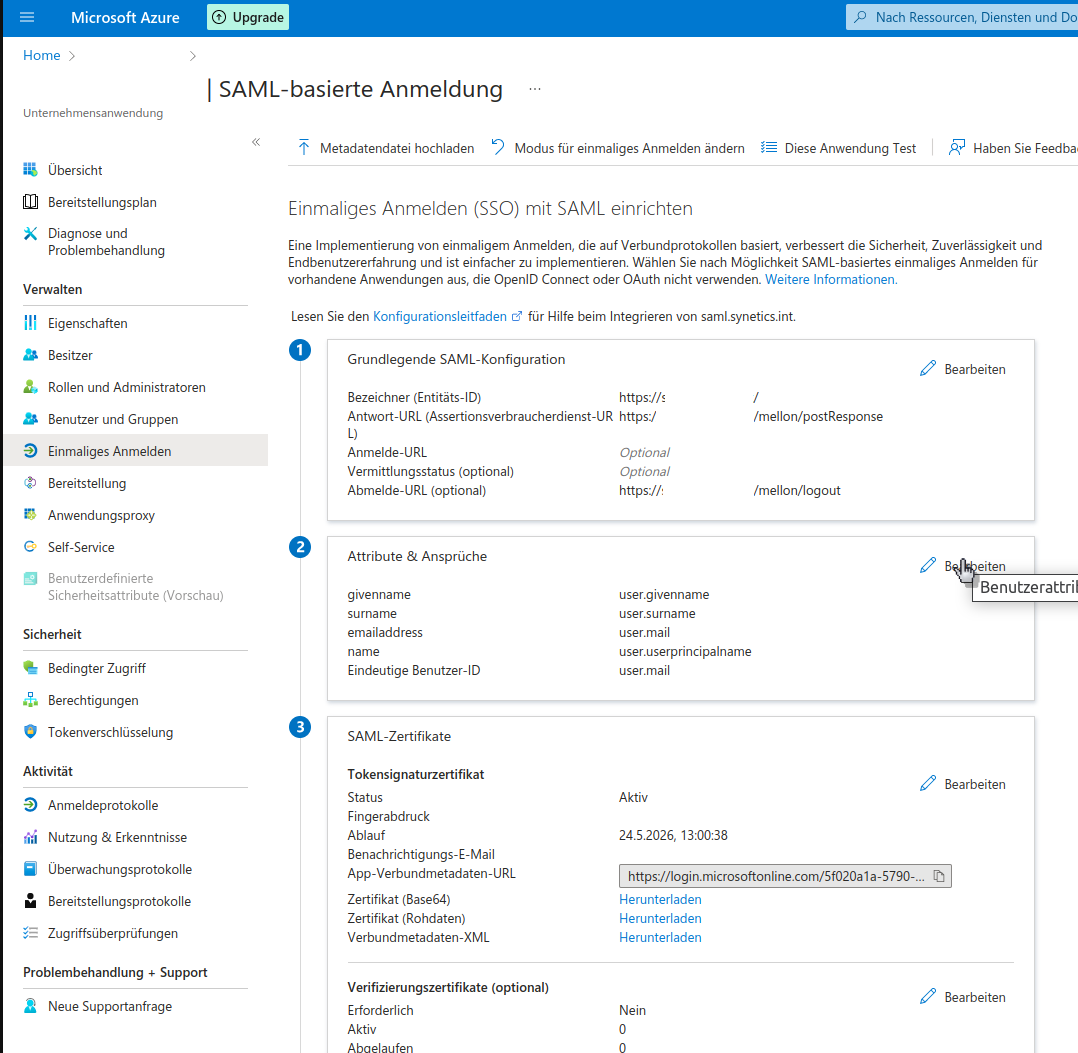
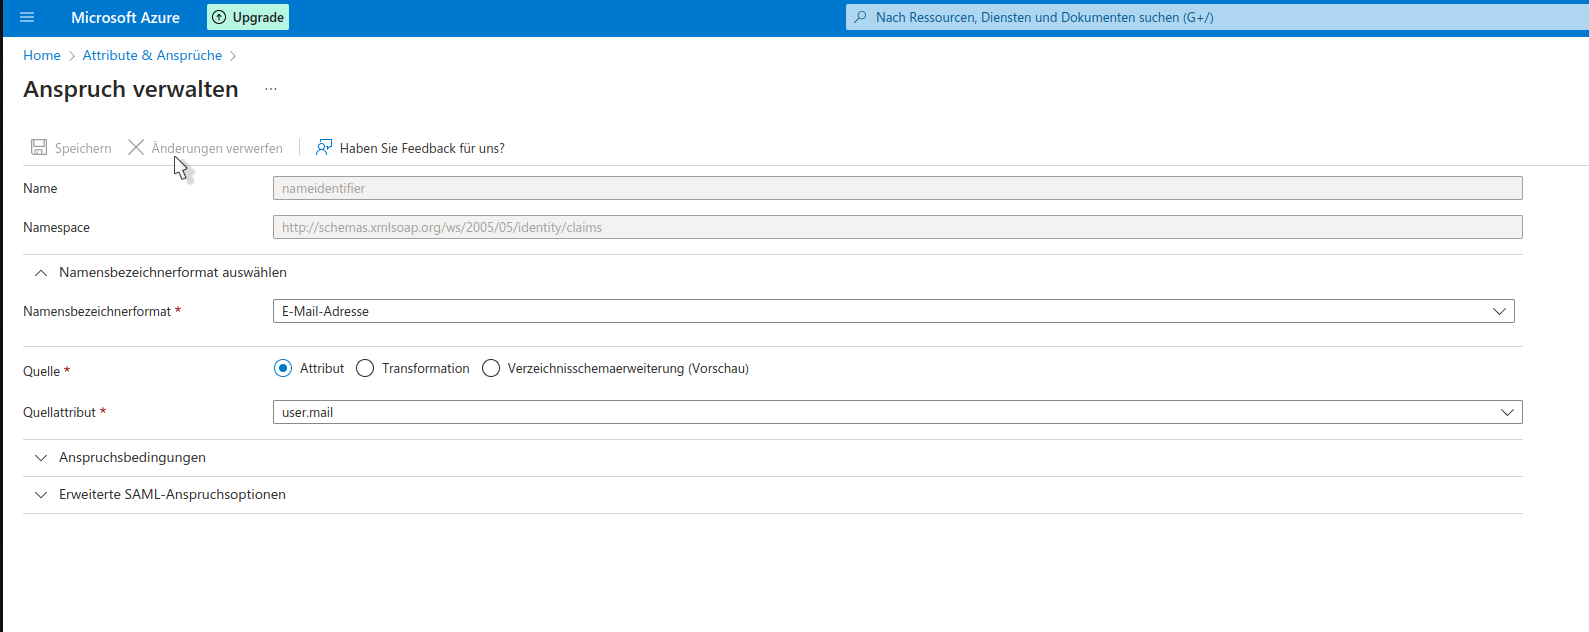
Under Required claim, edit the first displayed claim.
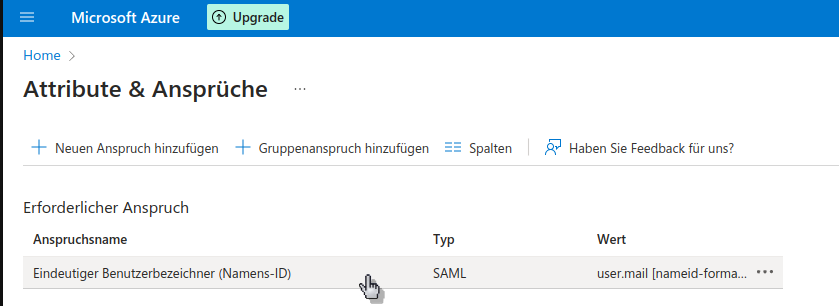
Change the name identifier format to Email address and the source attribute to user.mail. Then save the configuration.
The configuration of the enterprise application in Azure AD is now complete.
Enabling the configurations on the Linux server#
Provide the metadata XML#
Place the previously created metadata XML on your Linux server in the directory /etc/apache2/mellon so that Mellon can use it.
Filename
Please adjust the filename according to the mellon.conf to AzureAD_metadata.xml. Alternatively, adjust the filename in the mellon.conf.
Now test the configuration and enable all required modules.
Test the configuration#
1 | |
Enable modules and configs#
1 2 3 4 | |
The configuration of the Linux server is now complete.
If you now open the URL https://tu2-samlsso.synetics.test in your browser, you will be redirected to the Azure AD login. After successful login, you will be taken directly to your i-doit.
Fallback to login form
If a user logs in who does not yet exist in i-doit, they will automatically be redirected to the i-doit login form and can log in with a local user.